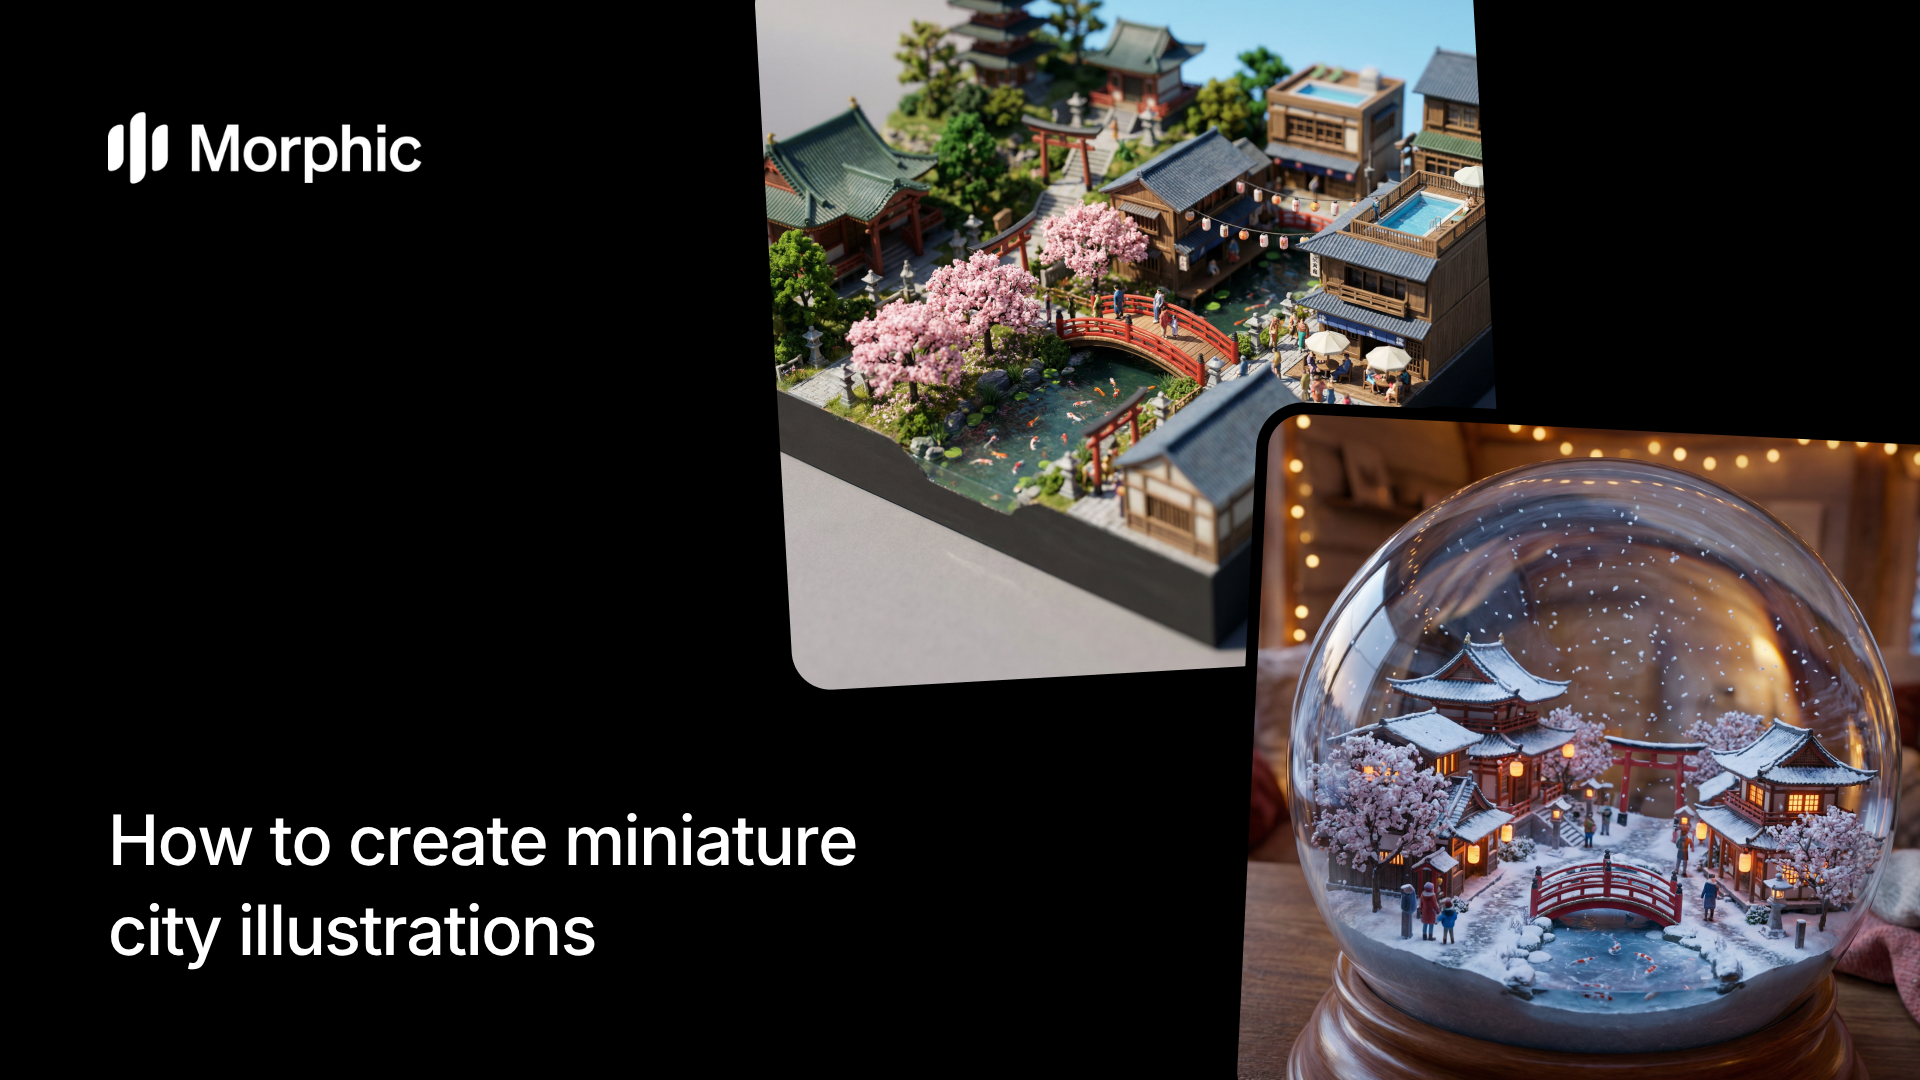
What is a miniature city illustration?
A miniature city illustration depicts an urban scene as though it were a tiny model or toy set. The effect is achieved through exaggerated depth of field, scaled-down proportions, saturated colors, and material textures like clay or plastic. These illustrations are popular for editorial design, game environments, architectural visualization, and social content that demands immediate visual impact.
Choose your city type, pick a miniature style, and Morphic generates a detailed illustration with accurate scale illusion, material rendering, and atmospheric depth built in.
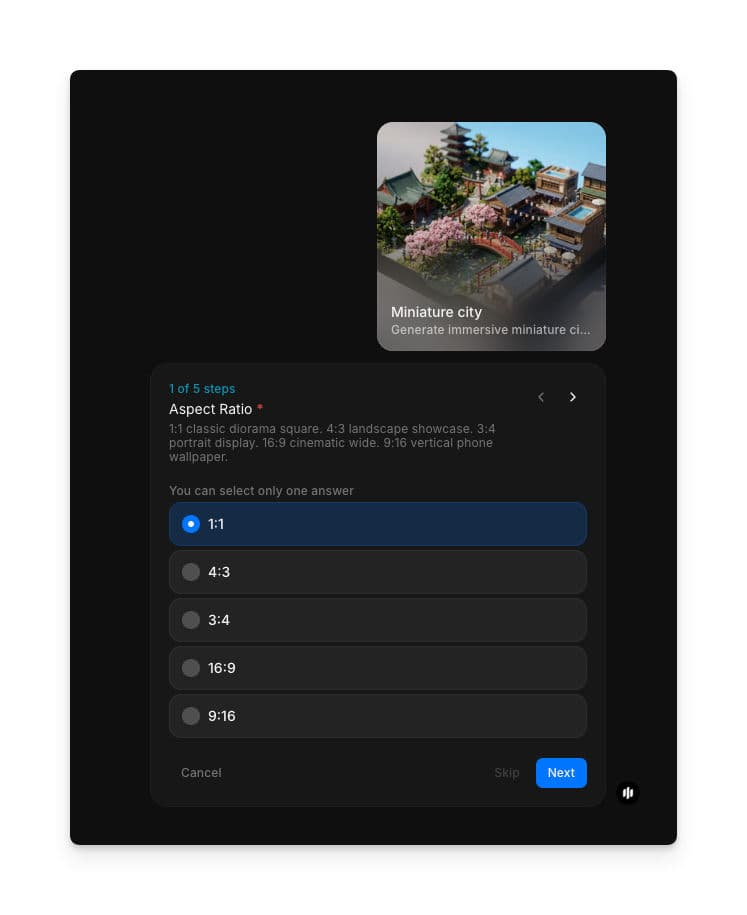
1.
Select your aspect ratio
Open the "Miniature city" workflow. In the "Aspect Ratio" step, choose the output dimensions. Options include 1:1, 4:3, 3:4, 16:9, and 9:16.
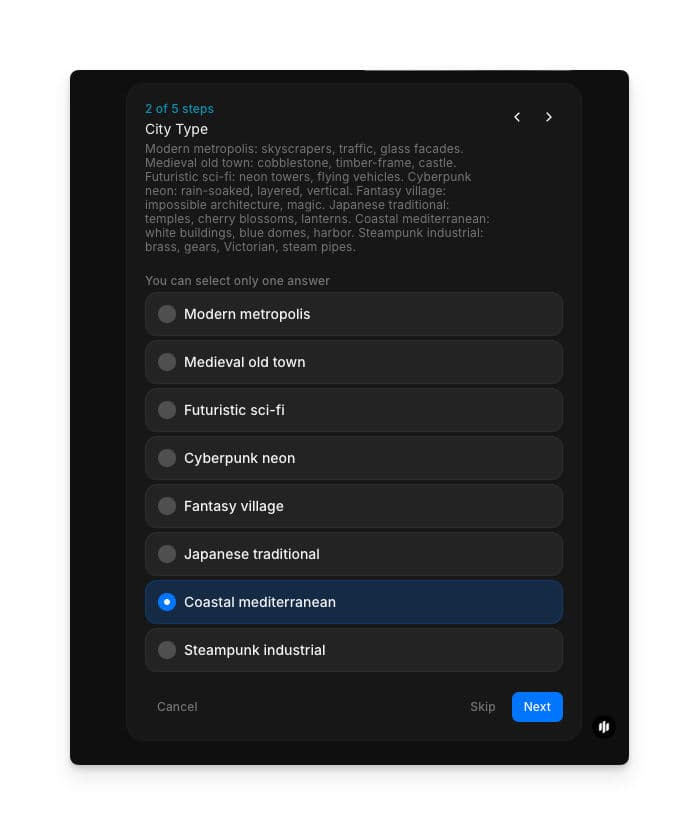
2.
Choose your city type
In the "City Type" step, select the kind of city you want. Options include Modern metropolis, Medieval old town, Futuristic sci-fi, Cyberpunk neon, Fantasy village, Japanese traditional, Coastal mediterranean, and Steampunk industrial.
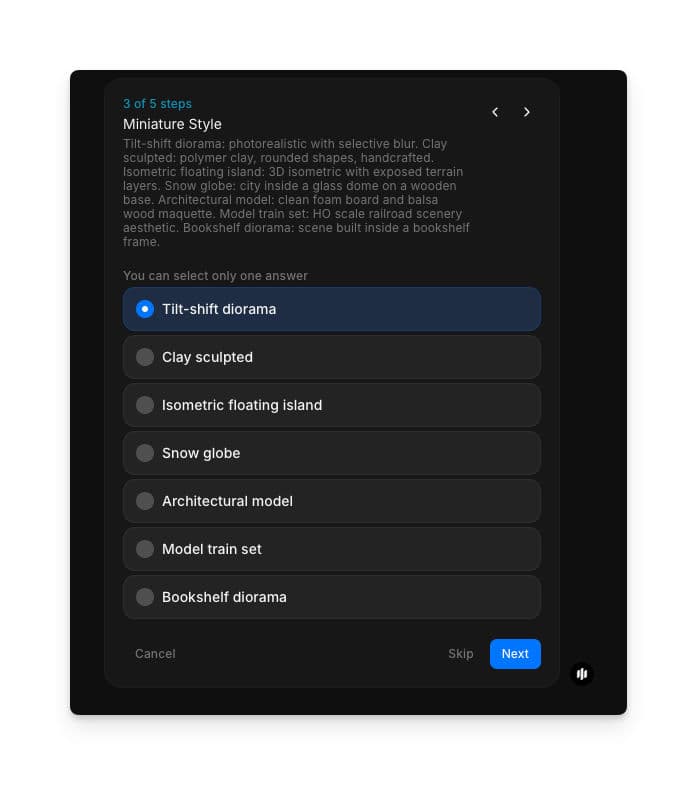
3.
Select a miniature style
Choose the visual treatment for your miniature city. Each style applies a distinct material and rendering approach to the scene.
| Style | Visual treatment | Best for |
|---|---|---|
| Tilt-shift diorama | Shallow depth of field with selective blur simulating macro photography | Editorial graphics and social media posts that need a photographic feel |
| Clay sculpted | Soft matte surfaces with rounded shapes and handcrafted texture | Playful brand visuals, children's content, and whimsical illustrations |
| Isometric floating island | 3D isometric view with exposed terrain layers beneath the city | Game assets, infographics, and fantasy-themed illustrations |
| Snow globe | City inside a glass dome on a wooden base with falling snow | Holiday campaigns, seasonal content, and decorative prints |
| Architectural model | Clean foam board and balsa wood maquette appearance | Concept art presentations, architecture pitches, and portfolio pieces |
| Model train set | HO scale railroad scenery aesthetic with miniature landscapes | Nostalgic content, hobby-themed visuals, and detailed dioramas |
| Bookshelf diorama | Scene built inside a bookshelf frame with layered depth | Creative social media content and unique display illustrations |
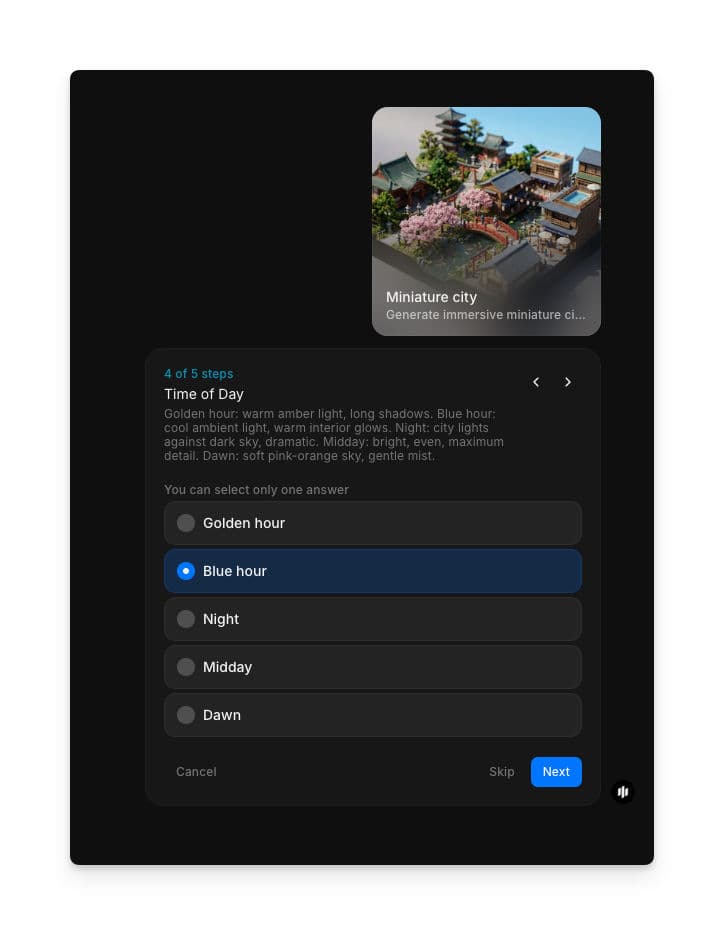
4.
Set the time of day
In the "Time of Day" step, choose the lighting condition for your scene. Options include Golden hour, Blue hour, Night, Midday, and Dawn.
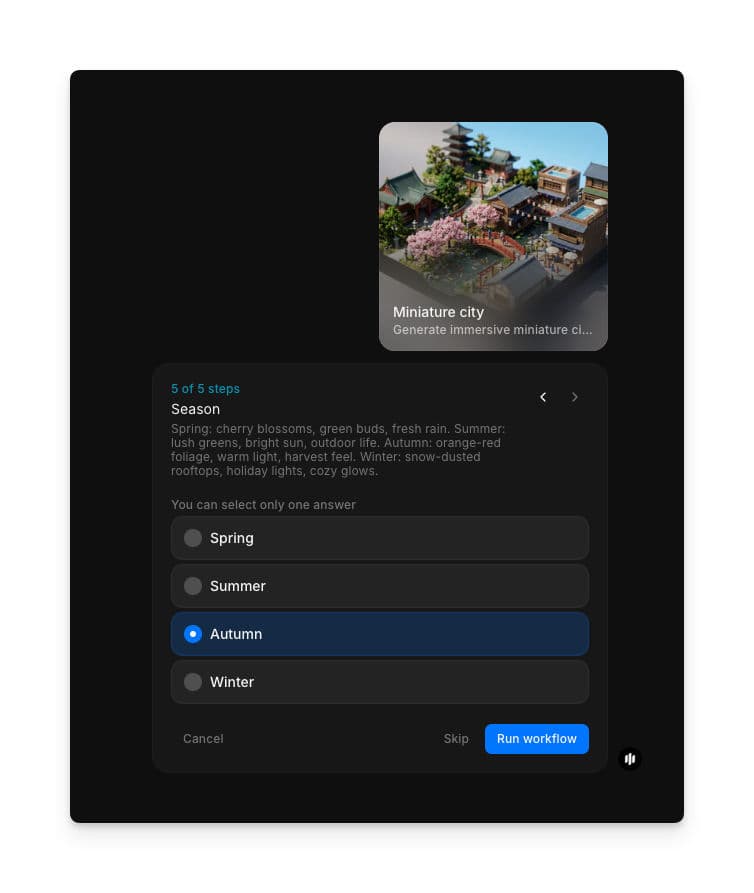
5.
Choose the season and generate
In the "Season" step, select from Spring, Summer, Autumn, or Winter. Click "Run workflow" to generate your miniature city illustration.

What makes a great miniature city illustration
| Quality | What it means | Why it matters |
|---|---|---|
| Scale illusion | The city convincingly reads as a tiny physical model rather than a full-size scene | Without believable scale, the miniature effect falls flat and the image looks like a standard cityscape |
| Material style | Surfaces consistently reflect the chosen style whether clay, plastic, wood, or photographic | Mixed or inconsistent materials break the illusion and make the scene feel unfinished |
| Atmospheric depth | Light, haze, and shadow create spatial dimension within the tiny scene | Flat lighting makes miniature scenes look like clipart rather than immersive worlds |
| Architectural detail | Buildings, streets, and props contain fine detail appropriate to the miniature scale | Lack of detail makes the scene feel empty while excessive detail undermines the toy-like quality |
Morphic handles material rendering, depth simulation, and architectural generation automatically, so you only need to choose your city and style.
Miniature city workflow vs. manual 3D modeling or tilt-shift photography
| Morphic's miniature city workflow | Manual 3D modeling or tilt-shift photography | |
|---|---|---|
| Cost | Available on Morphic | 3D software licenses plus significant artist time, or specialized tilt-shift lens equipment |
| Time to create | Minutes | 10 to 40 hours for 3D modeling or extensive post-processing for tilt-shift photography |
| Style variety | Switch between tilt-shift, clay, isometric, snow globe, and diorama instantly | Each style requires rebuilding materials and lighting from scratch |
| Architectural detail | AI generates contextually appropriate buildings and props automatically | Every building, vehicle, and prop must be modeled or sourced individually |
| Iteration speed | Regenerate with different settings instantly | Each revision means re-rendering or reshooting |
| Technical skill required | None | Advanced 3D modeling, texturing, and compositing knowledge required |
FAQs
Yes. All images generated through Morphic are licensed for commercial use, including editorial, advertising, merchandise, and digital products.
Each generation uses a single miniature style. To combine styles, generate separate illustrations and composite them in your preferred image editor.
Morphic generates high-resolution illustrations suitable for both digital use and print production. The exact dimensions depend on the aspect ratio you select.
The workflow generates cities based on the selected city type. For specific landmarks, describe them in any available prompt field or generate a base city and add custom elements in post-production.
You can run the workflow multiple times as needed, experimenting with different city types, miniature styles, times of day, and seasons.