Members
Manage organization members and their roles from the Members tab.
You can manage your organization's members and their roles in the Members section of Settings.
Manage Members
- Open the org/account dropdown (click the Morphic logo in the top-left corner).
- Select Settings.
- From the left sidebar, click Members.
- Here, you can view all members, invite new ones, and update or remove roles.
Or go straight there: studio.morphic.com/settings/members
Add Member
- Go to the Members section.
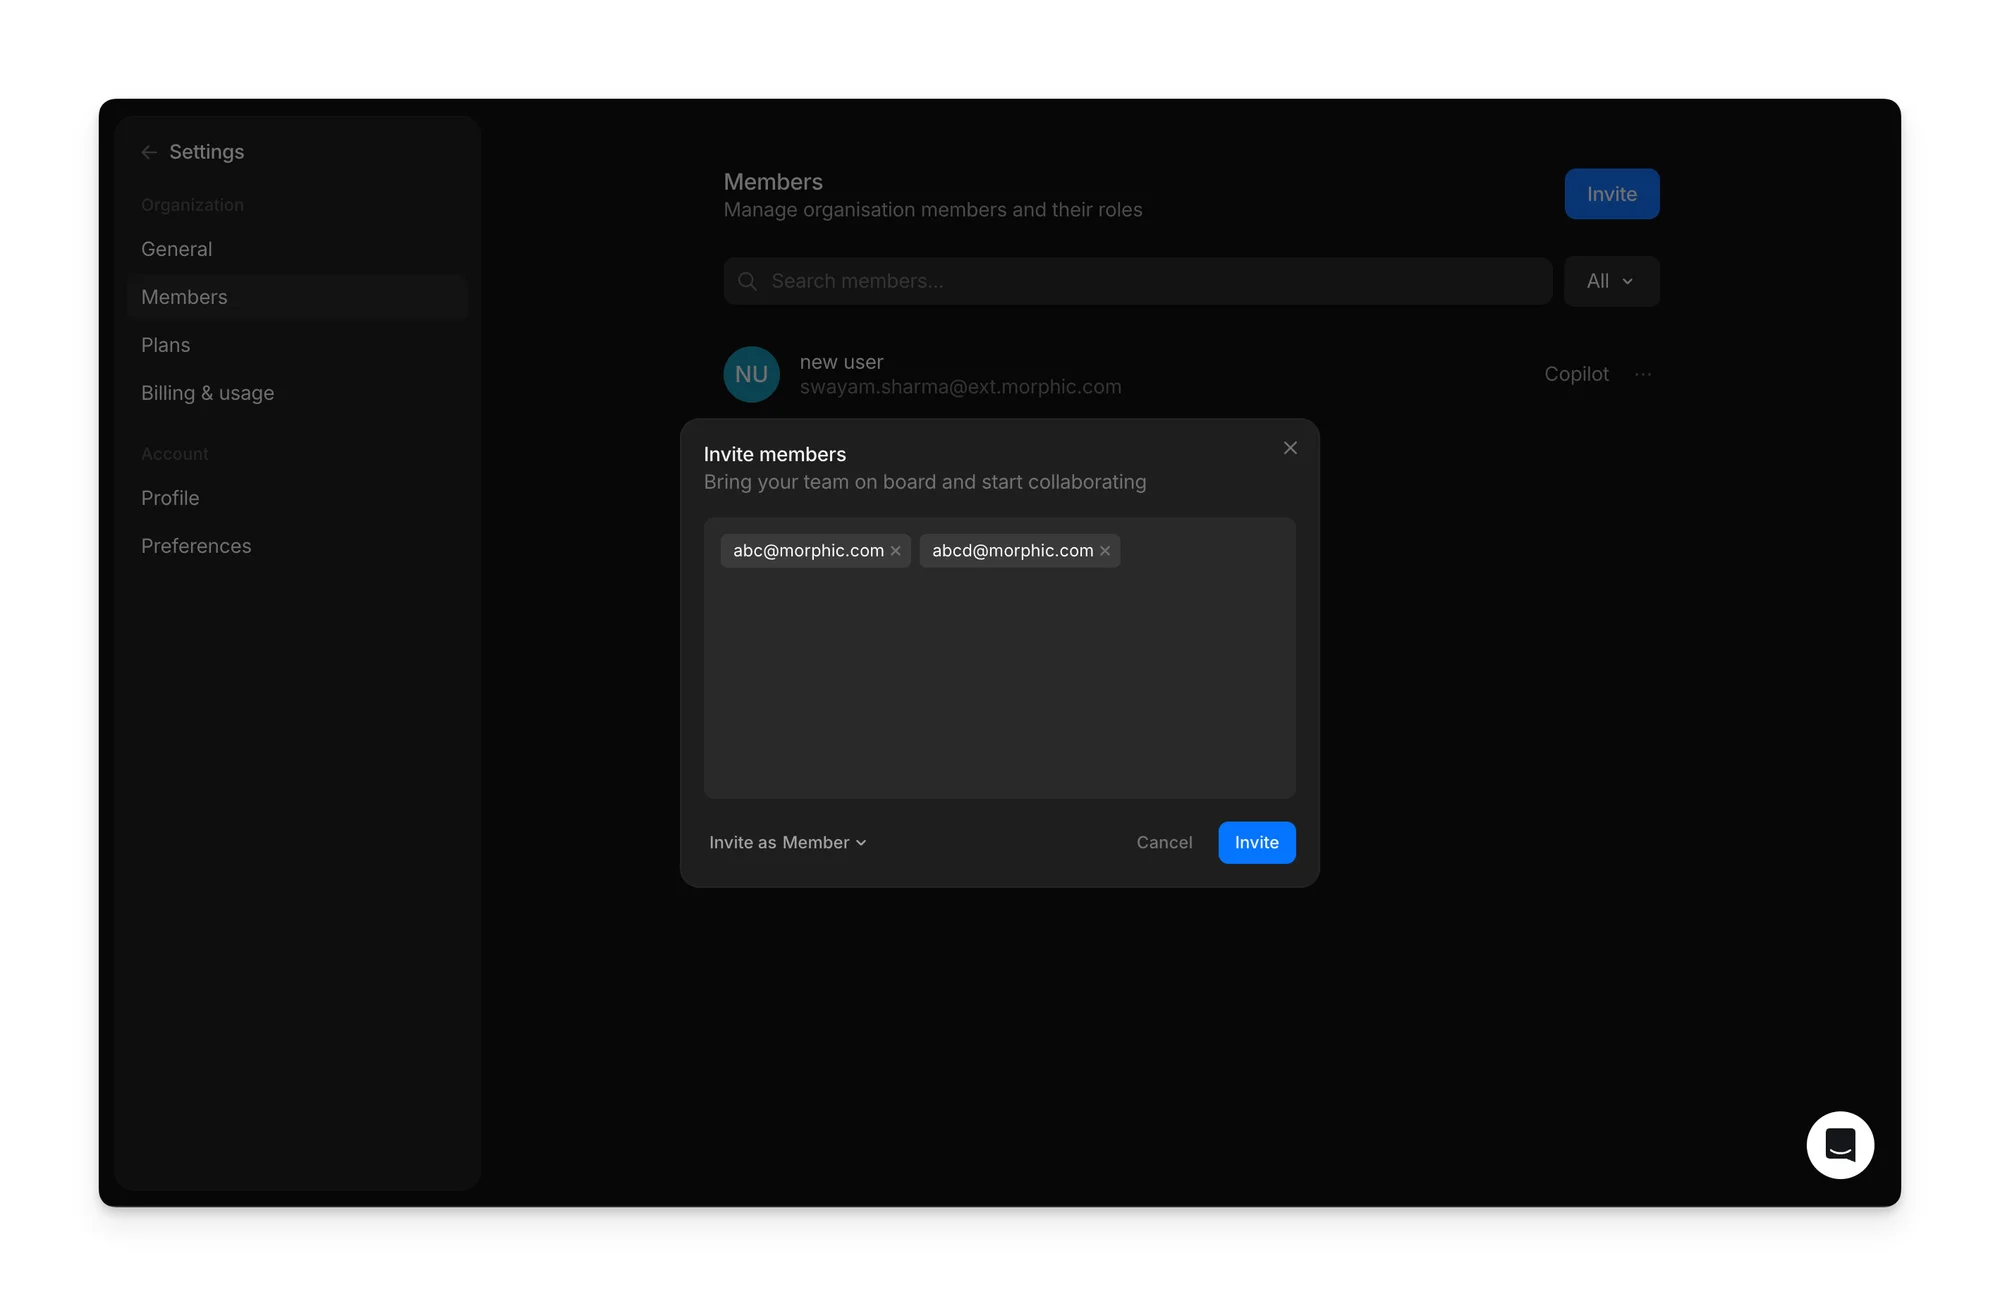
- Click the Invite button in the top-right corner.
- Type the email addresses you want to invite, separated by spaces or commas. You can add several at once.
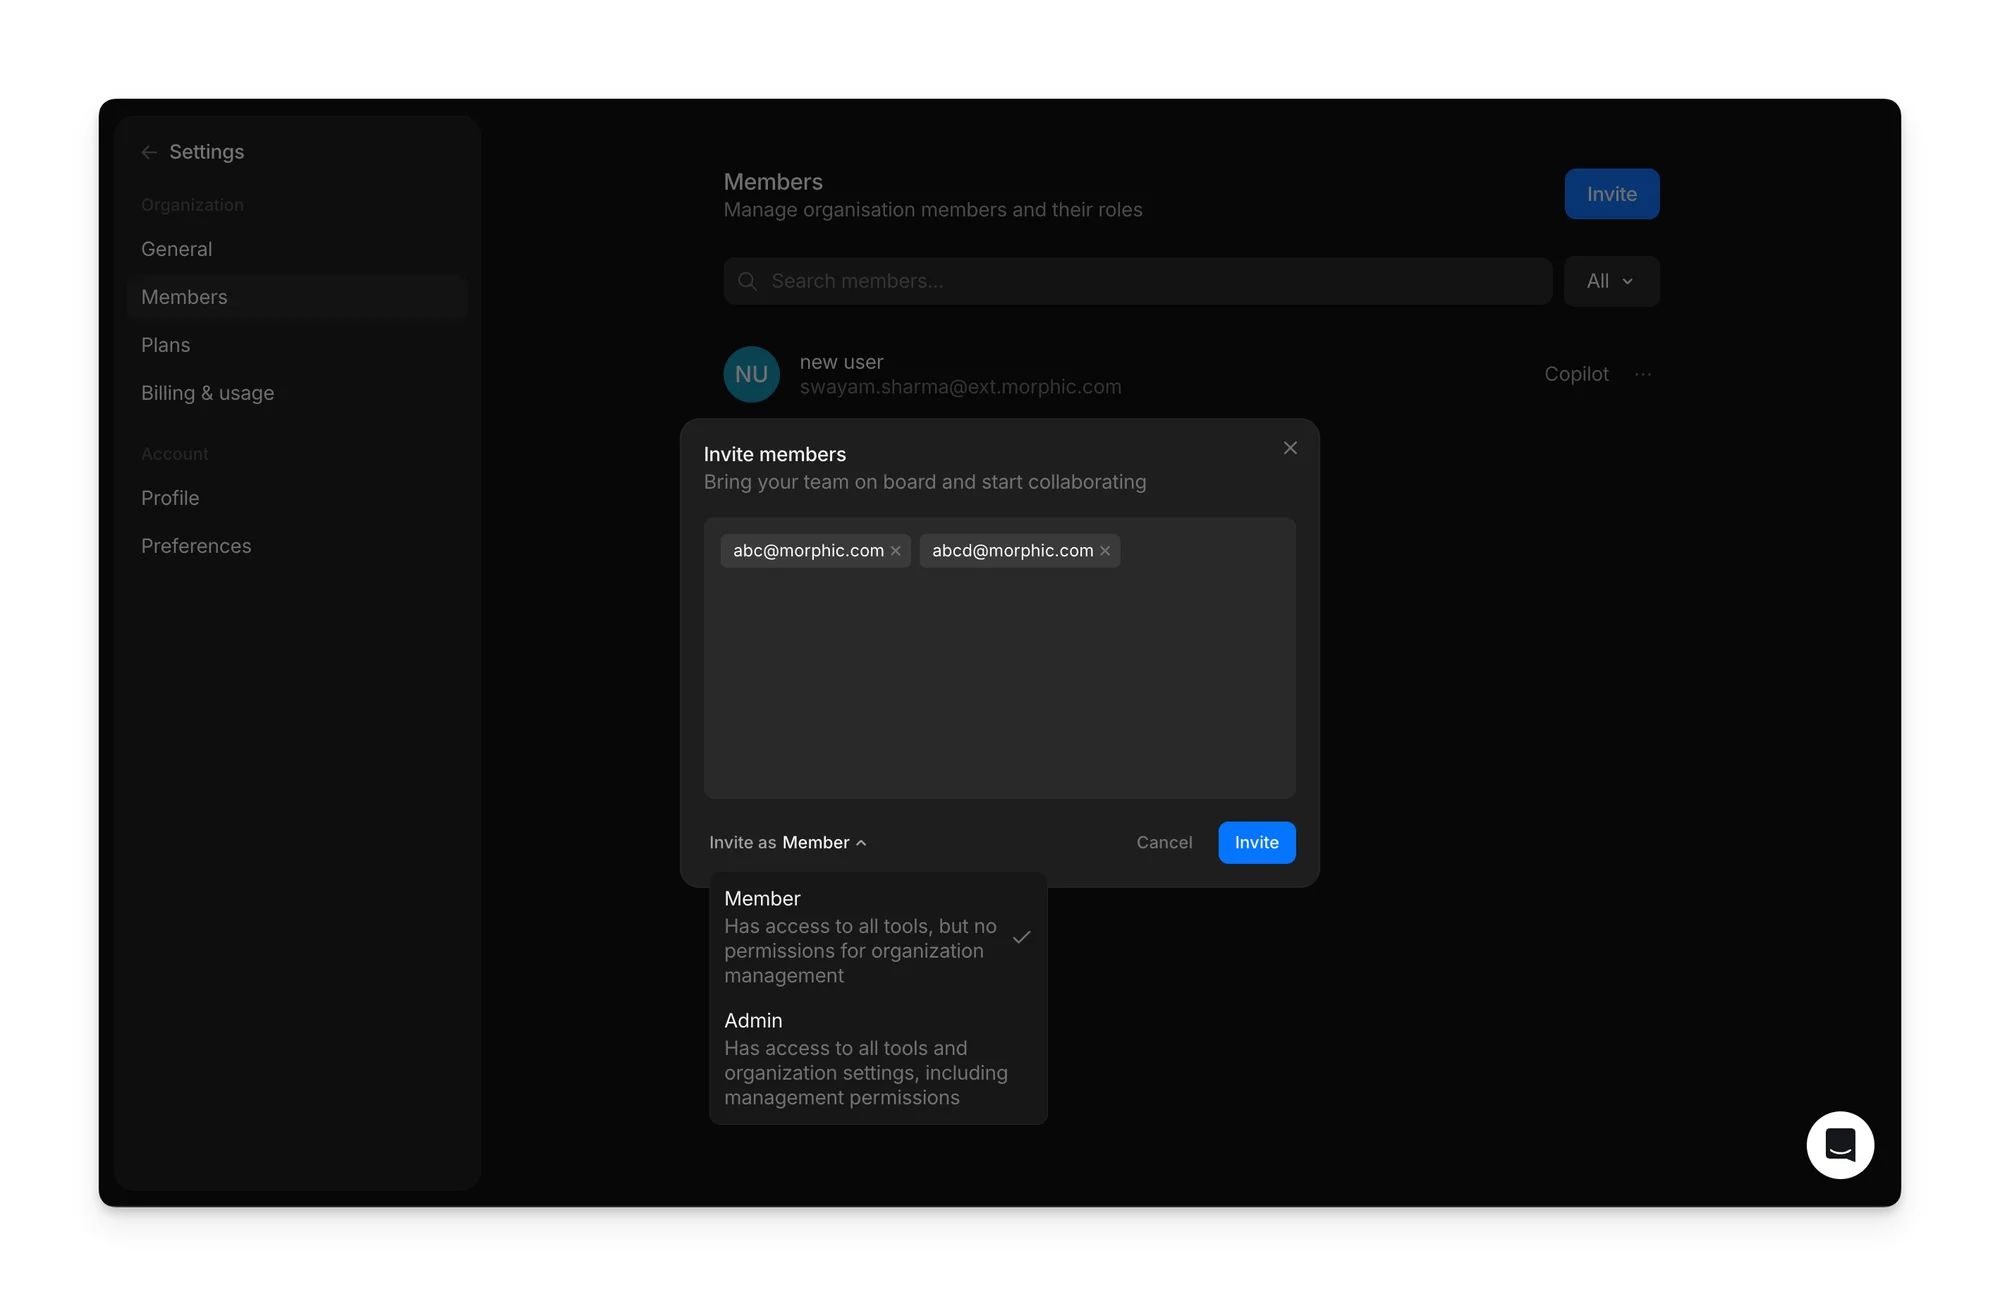
- Click 'Invite as' at the bottom-left of the dialog and pick the role they join with (Member or Admin).
- On plans that charge per seat, the dialog tells you what the additional members cost per month and what your payment method will be charged in total.
- Click Invite. The invitee will receive an email with instructions to join your organization.
View Members
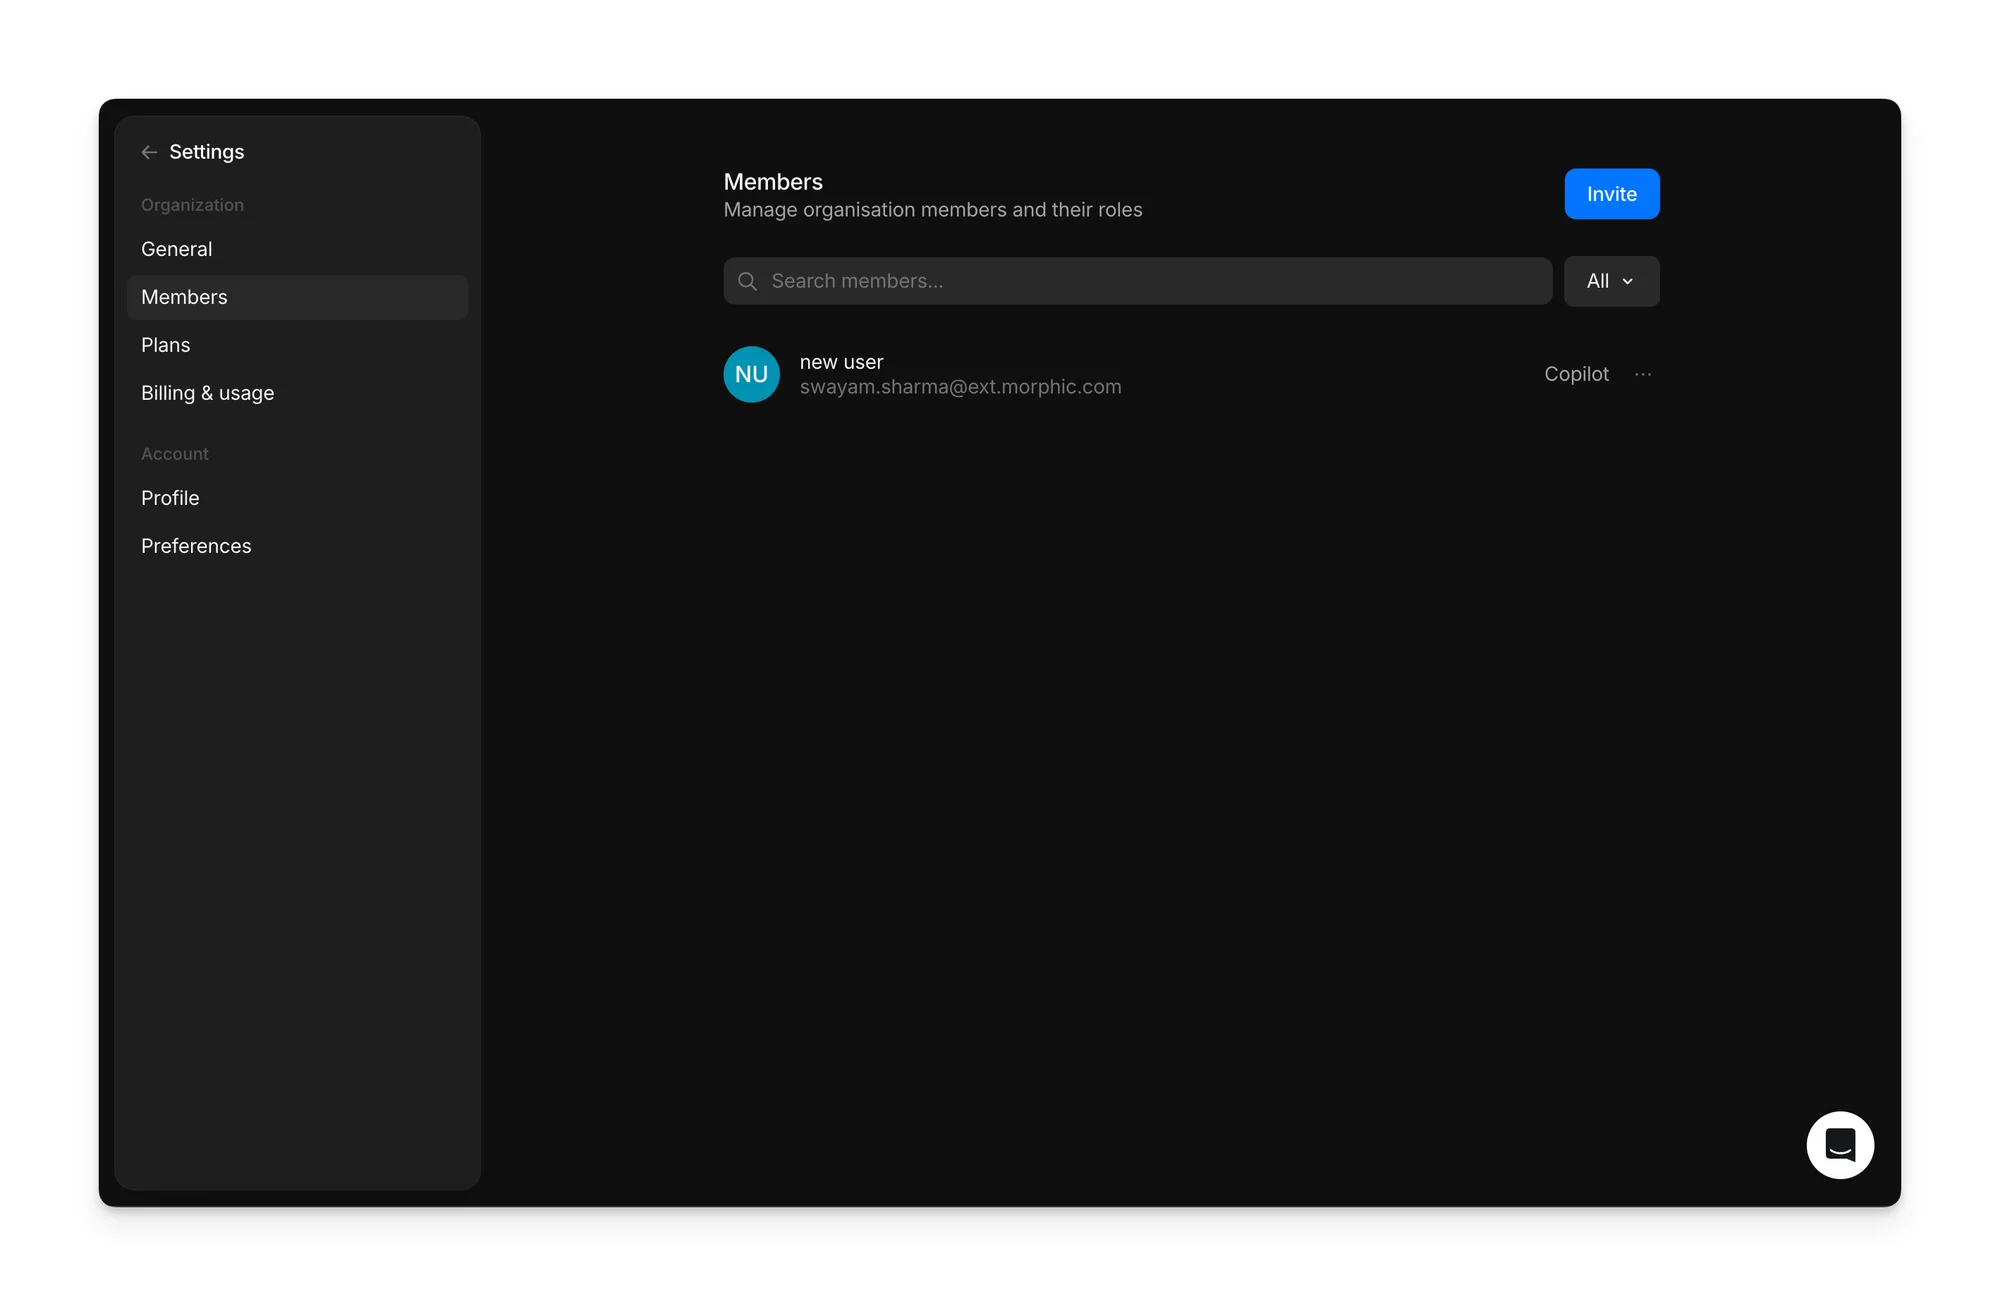
- You will see a list of all current members with their roles displayed beside their names.
- Use the search bar at the top to quickly find a member by name or email.
- Use the dropdown beside the search bar to show everyone, only Admins, only Members, or the invitations still Pending.
Change Member's role
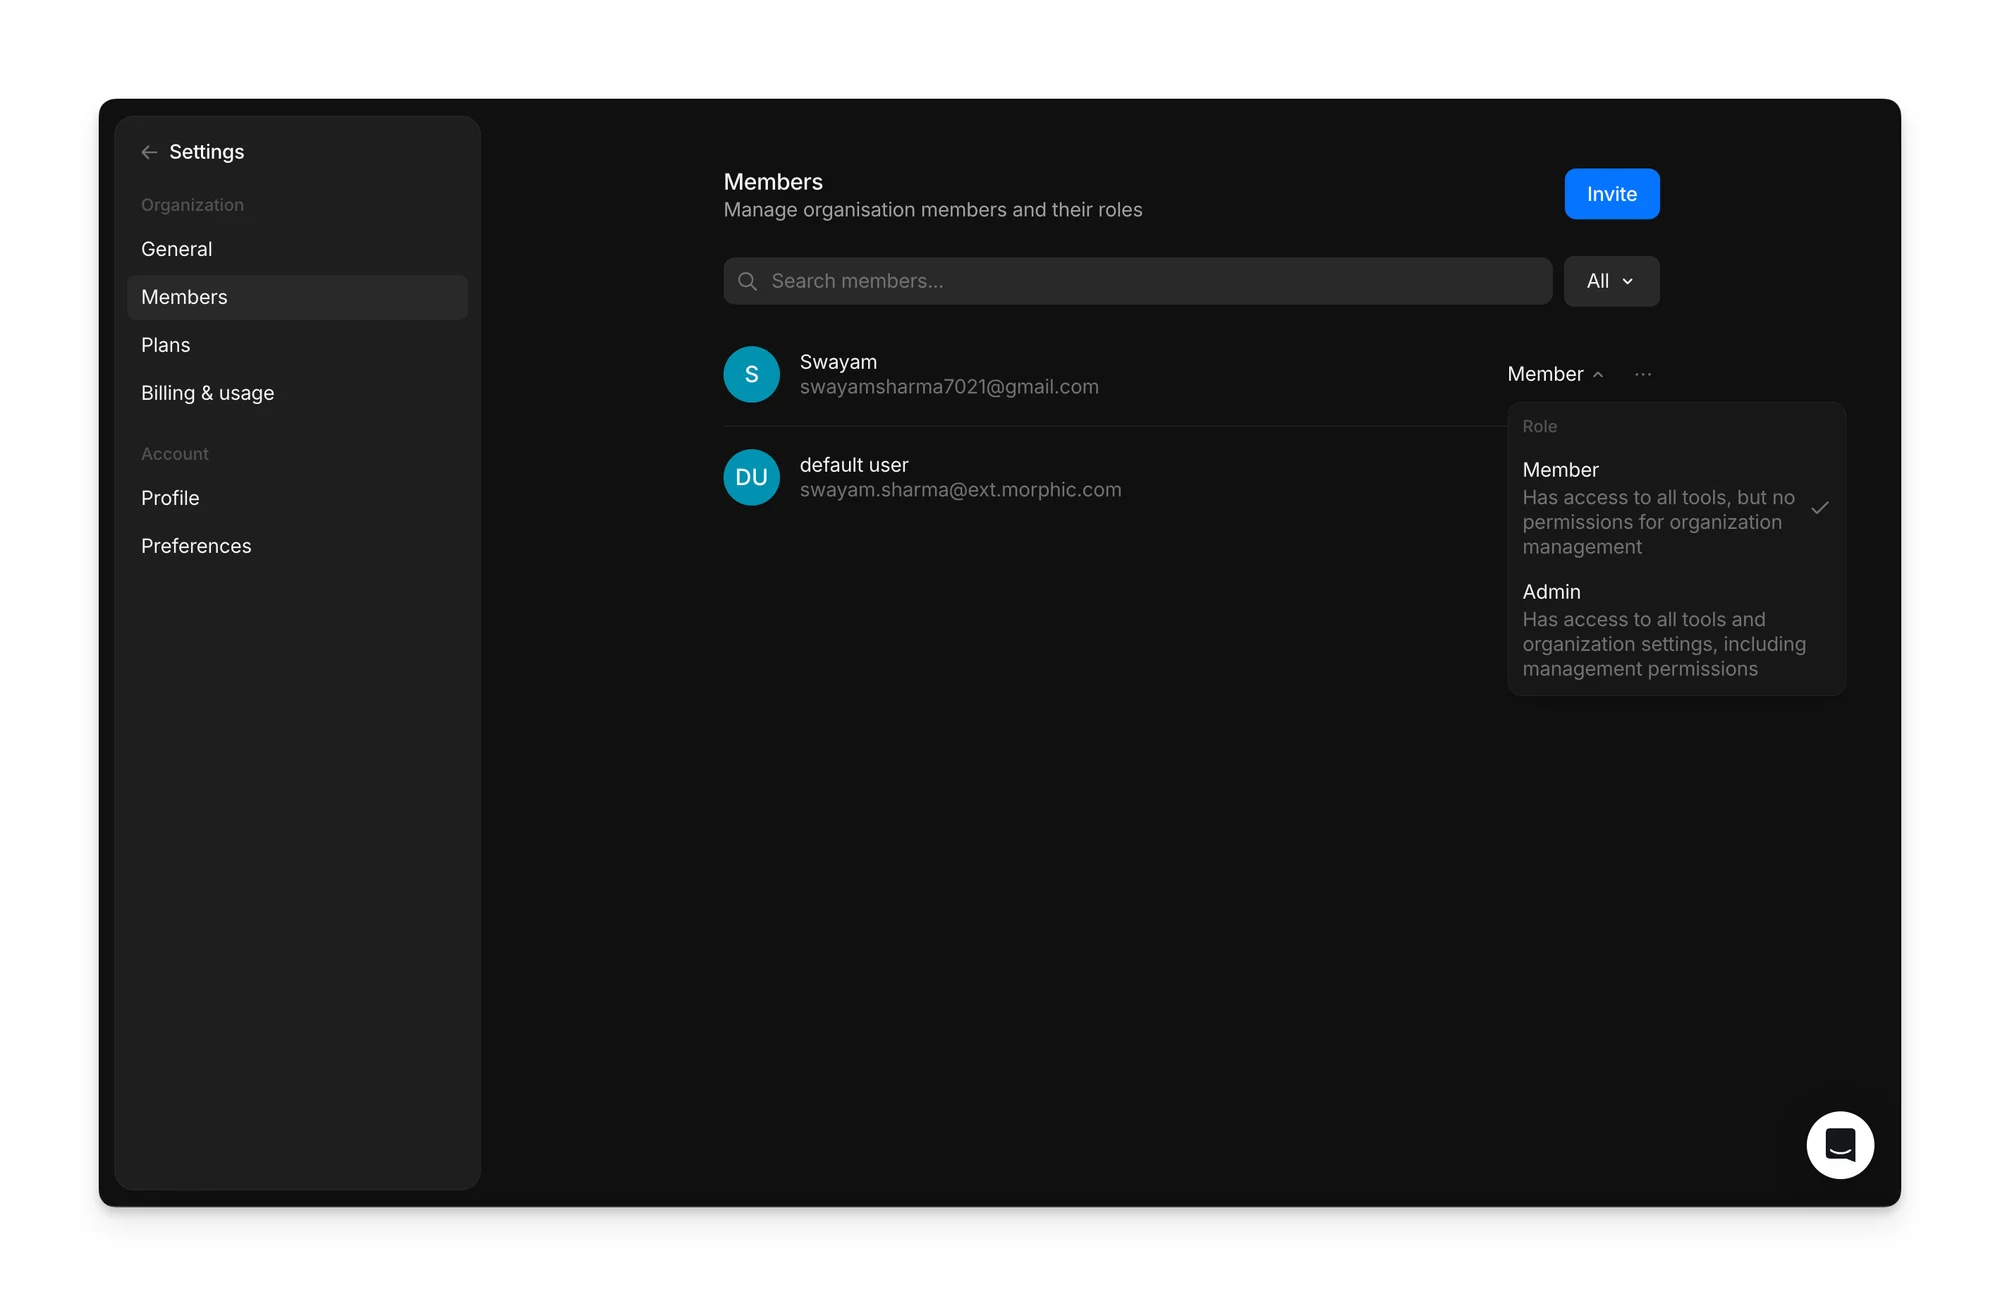
- Find the member in the list.
- Click the role dropdown beside their name.
- Pick Member or Admin. A Member has access to all the tools but no organization management permissions; an Admin also gets organization settings and management permissions.
Remove Member
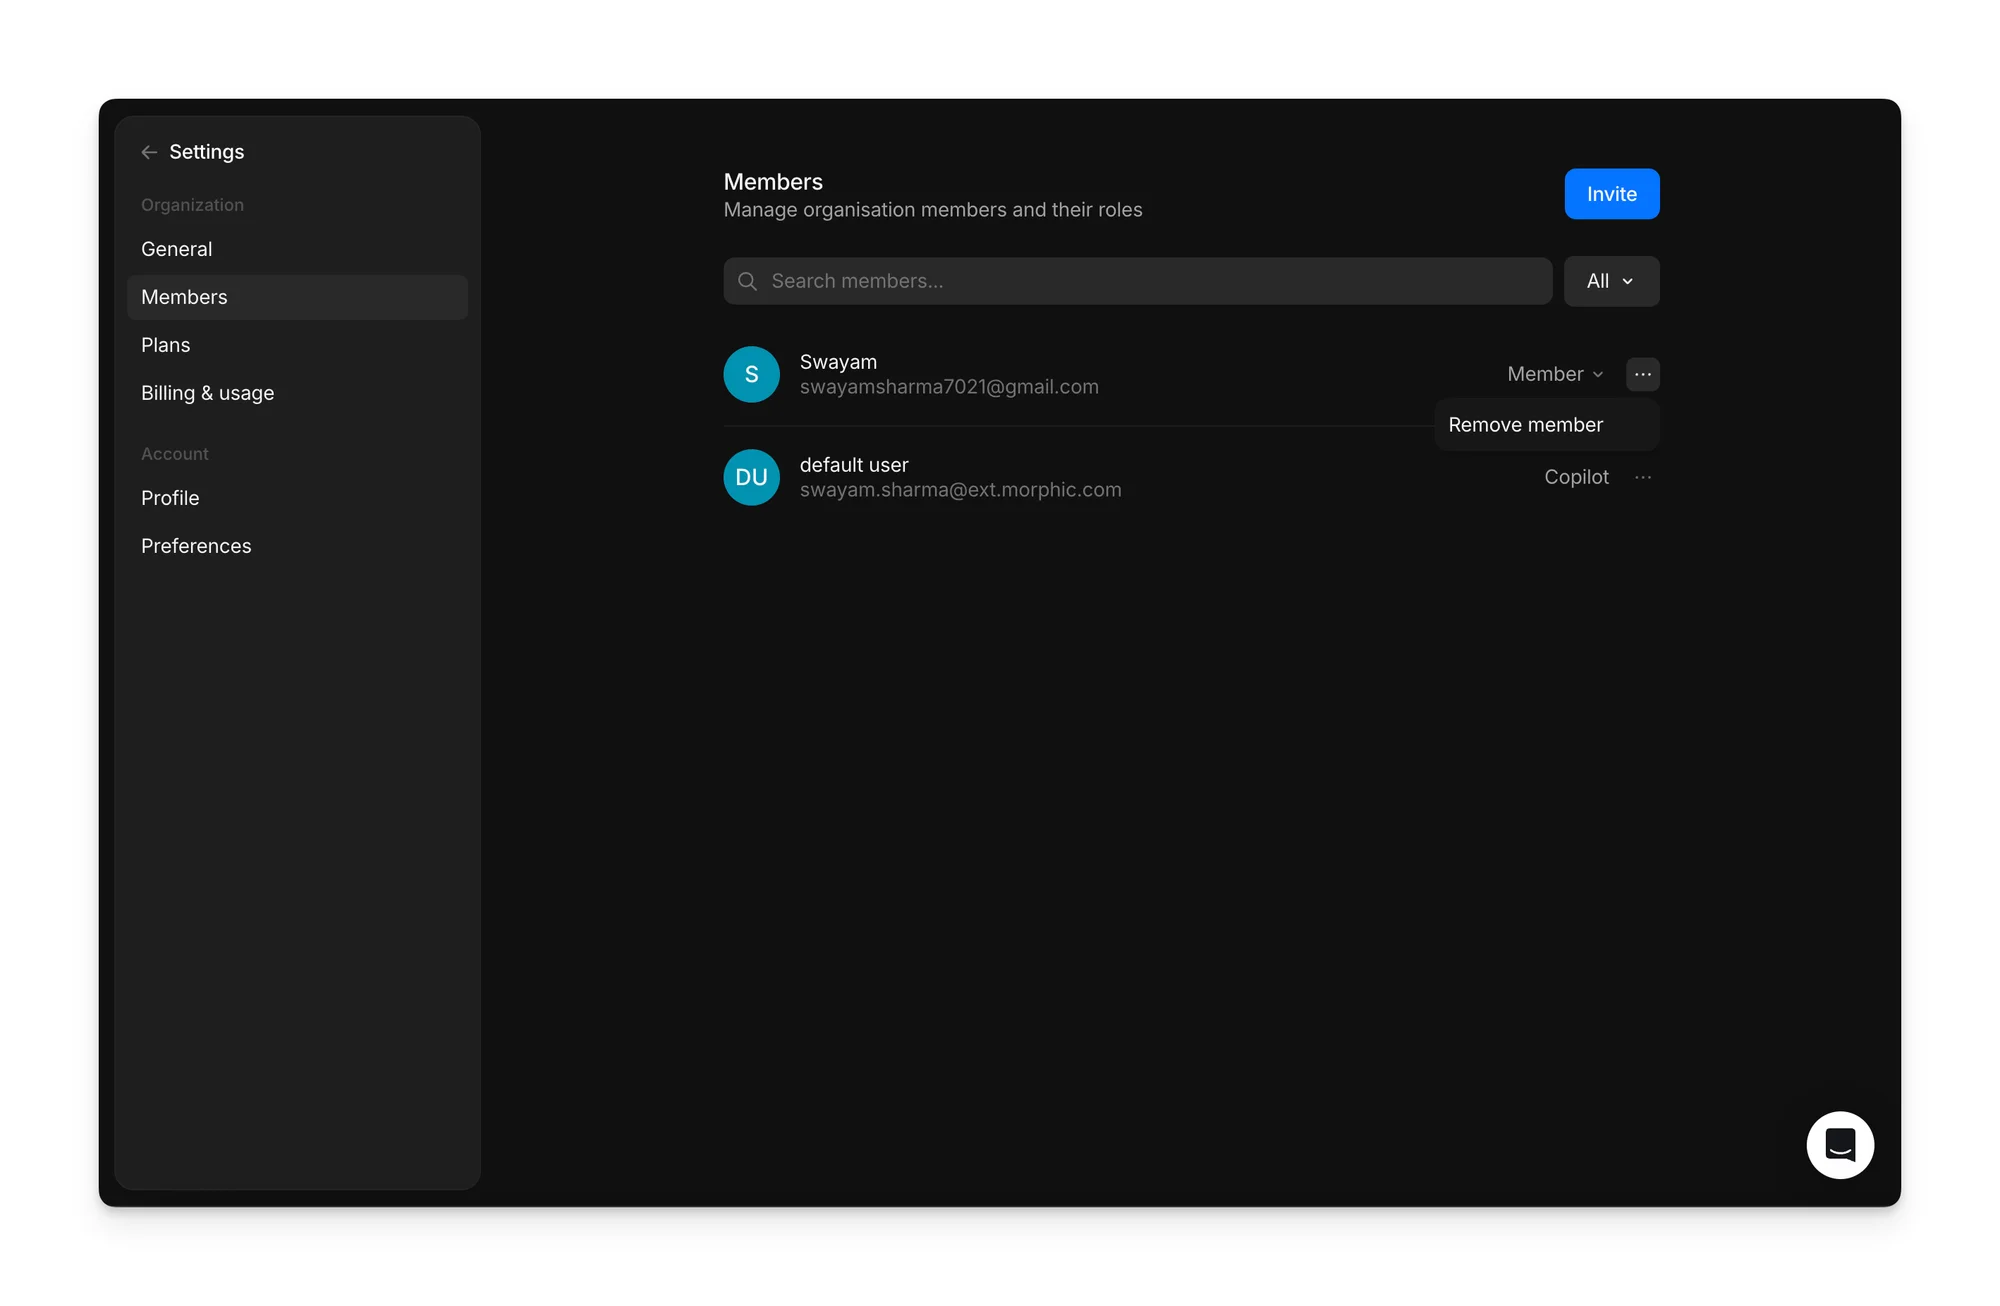
- Find the member in the list.
- Click the '…' menu beside their name.
- Select Remove member to remove them from the organization.
That's how you manage members on Morphic. You decide who is in your organization and what they are able to do.
If you have any trouble or have any questions, feel free to reach out. We're happy to help. Write to us at support@morphic.com.