Build a set
Add people, vehicles, furniture, props and whole environments to a 3D scene, move, rotate and scale them along the X, Y and Z axes, and reuse an arrangement.
Sets in a 3D scene are built from a ready-made library, so you can block a location in minutes without modelling anything.
Add objects
- In the editor, click 'Add object', the '+' at the top left
- Hover over a category
- Click the object you want. It appears on the floor, selected
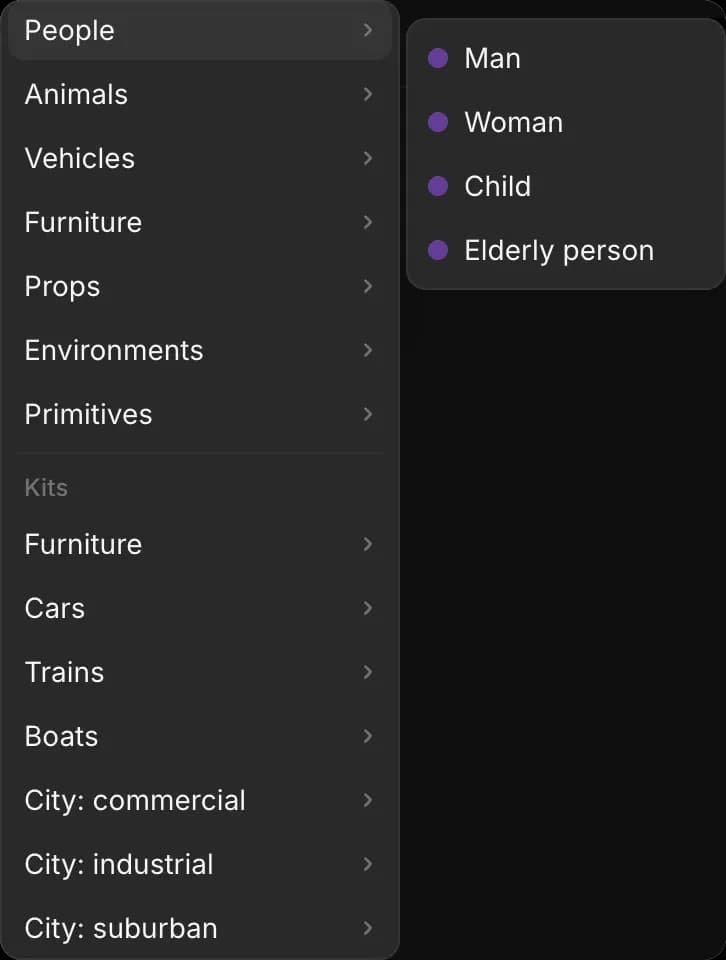
The categories:
| Category | What is in it |
|---|---|
| 'People' | Man, Woman, Child, Elderly person |
| 'Animals' | Dog, Cat, Horse, Bird |
| 'Vehicles' | Cars, a bus, a train car, an airplane, a boat and more |
| 'Furniture' | Pieces for homes, offices, kitchens, bathrooms and hospitals |
| 'Props' | From phones and cups to streetlights, crates, tents and a fountain |
| 'Environments' | Ready-made sets, such as a city street, office, nightclub, beach, forest, courtroom and plane cabin |
| 'Primitives' | Cube, Cylinder, Ramp, Wall segment, Stairs |
| 'Lights' | Point light, Spotlight, Directional light |
| 'Basic objects' | Character, Box, Sphere, Cylinder, Cone, Torus, Wall, Platform, Vehicle |
The 'Kits' group, between 'Primitives' and 'Lights', holds thousands of extra models: furniture, cars, trains, boats, city and building pieces, nature, and themed sets such as a castle or a space station. Copilot can find any of them by name; see Edit with Copilot.
Start with an environment, then add the cast and props into it.
Axes
A 3D scene measures every place along three axes, in metres from the centre of the floor. Each axis has a color, and the handles you drag use the same colors.
| Axis | Color | Direction |
|---|---|---|
| X | Red | Across the floor |
| Z | Blue | Across the floor, at right angles to X |
| Y | Green | Up and down. The floor is at 0 |
To show or hide the axis lines at the centre of the floor, open the 'View' menu and click 'Show axes'.
Move, rotate and scale
Select the object first: click it in the viewport, or click its name in 'Layers' on the left. Then pick the move, rotate or scale tool, the three icons at the top left of the viewport, or press its key.
Move
Shortcut: G.
- Drag an arrow to move the object along that axis
- Drag a colored square to move it along two axes at once. The green square slides it across the floor without lifting it
Rotate
Shortcut: R.
Drag a ring to turn the object around that axis. The green ring turns it on the spot, which is how you change the way a character faces. Rotation is in degrees: 90 is a quarter turn, 180 turns it round. At 0, people and props face along the blue Z axis.
Scale
Shortcut: S.
Drag a handle to stretch the object along that axis. A scale of 1 is the object's original size, 2 is twice as big, and 0.5 is half.
Exact values
- Select the object
- Click the 'Selection' tab
- Under 'Position', 'Rotation' or 'Scale', click the X, Y or Z box, type a number, and press Enter. Or drag left and right across the box to change the number
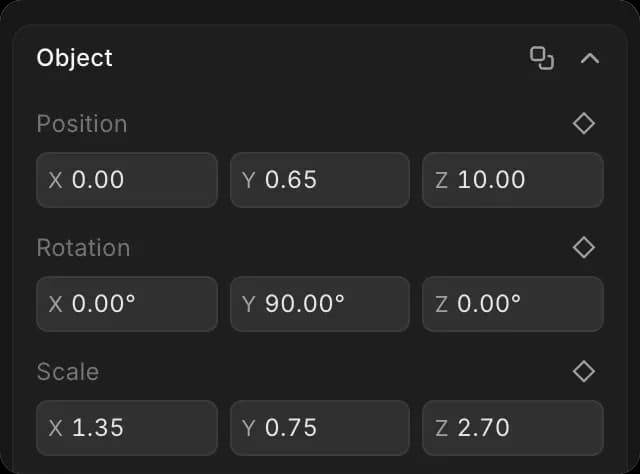
- To resize evenly, type the same number into all three 'Scale' boxes
- A turn of more than 90 degrees can show -180 in X and Z. It is the same turn written another way, and the object stays upright
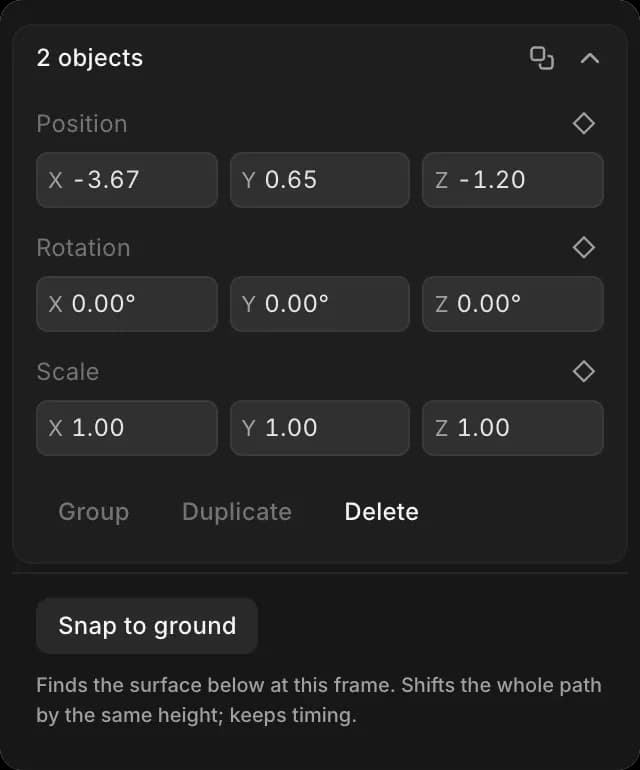
- If an object floats or sinks, click 'Snap to ground' at the bottom of the 'Selection' tab. It drops onto the surface below, and its whole path moves with it
Duplicate, group and delete
To select several objects, click the first in 'Layers', then Shift-click the others. The 'Selection' tab shows how many are selected.
- 'Duplicate' and 'Delete' are in the 'Selection' tab, under the object's settings
- 'Group', in the 'Selection' tab when several objects are selected, makes them move together. Cmd + G does the same, and Cmd + Shift + G ungroups them
Color and visibility
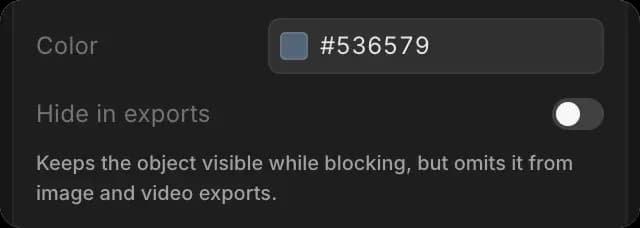
Select the object, then in the 'Selection' tab:
- 'Color' tints it
- 'Hide in exports' keeps it visible while you block, but leaves it out of image and video exports. Use it for guides and marks
Staging presets
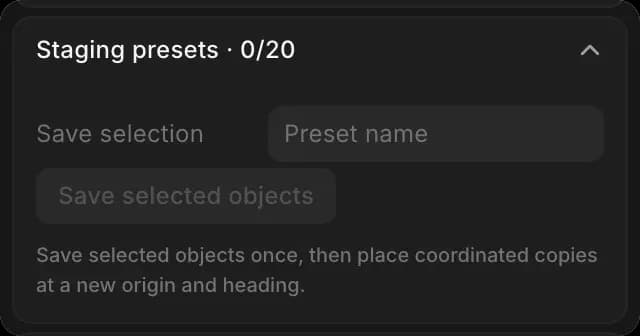
Save an arrangement, such as a table with its chairs, and place fresh copies of it anywhere. A scene holds up to 20 presets.
To save one:
- Select the objects: click the first in 'Layers', then Shift-click the others
- Click the 'Scene' tab
- Under 'Staging presets', type a name in 'Save selection'
- Click 'Save selected objects'
To place a copy:
- Move the playhead to the frame where the copy should start
- Under 'Staging presets', pick the preset in 'Preset'
- Set 'Origin' and 'Heading' for where it goes and which way it faces, or select an object and click 'Use selected position'
- Click 'Place staging copy'
Each copy keeps the objects' animation and stays editable. 'Remove preset' deletes the preset, not the copies.
That's how to build a set in a 3D scene on Morphic. Block the broad layout first, then fine-tune positions once the camera is set.
If you have any trouble or have any questions, feel free to reach out. We're happy to help. Write to us at support@morphic.com.