Motion and framing
Move, resize and rotate a clip in the frame, change how fast it plays, and animate any of it over time.
Select a clip and the right panel becomes the inspector: settings for that one clip. The 'Video' tab controls where the picture sits and how it plays. Nothing here changes your original file.
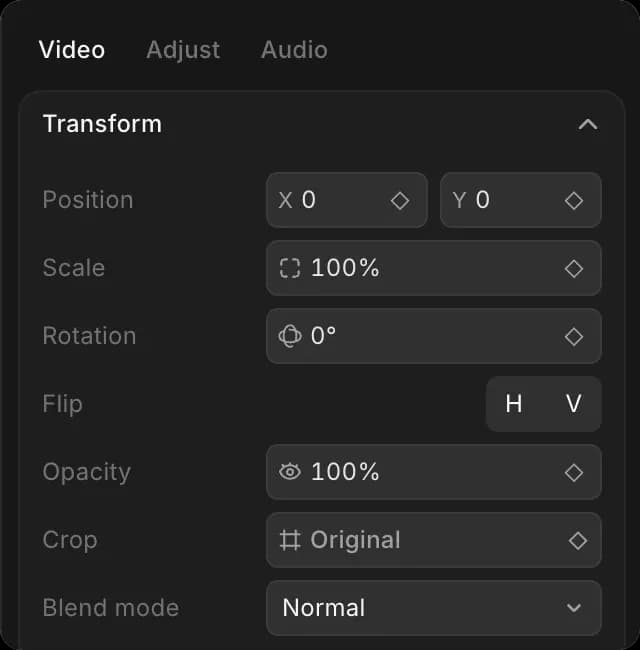
Position, scale and crop
| Control | What it does | Animates |
|---|---|---|
| 'Position' | Slides the picture left, right, up or down | Yes |
| 'Scale' | Makes it bigger or smaller | Yes |
| 'Rotation' | Turns it | Yes |
| 'Crop' | Cuts away the edges | Yes |
| 'Opacity' | Makes it see-through, so the lane below shows through | Yes |
| 'Flip' | Mirrors it across or top to bottom | No |
| 'Blend mode' | How this clip mixes with the lane below | No |
There is a blend mode for most compositing jobs. 'Multiply' and 'Darken' keep the dark parts, 'Screen' and 'Lighten' keep the bright parts, and 'Overlay' and 'Soft light' add contrast.
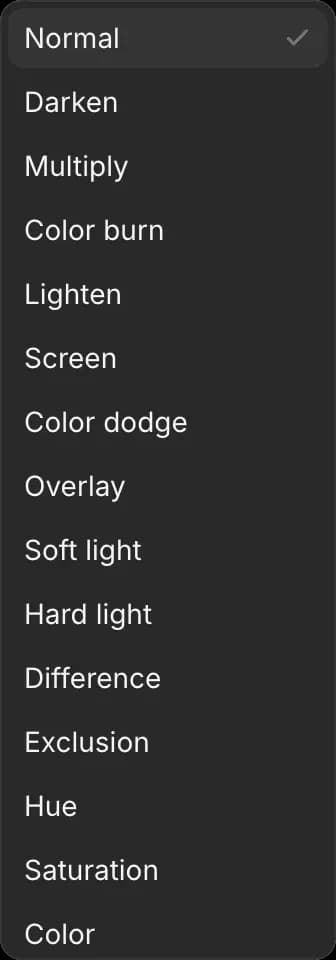
Opacity and blend mode are what you use to lay one clip over another rather than cut between them.
Keyframes
A keyframe records a value at a moment in time. Set two, and Compose fills in the change between them.
- Move the playhead to where the move should start
- Set the value you want, then click the diamond next to it
- Move the playhead to where the move should end
- Change the value again
That is all a slow zoom is: scale 100% at the start, 110% at the end. The same trick gives a title that drifts across the frame, or a clip that fades up.
Position, Scale, Rotation, Opacity and Crop all have the diamond.
How a move eases in and out is set per keyframe. 'Hold' jumps to the value, 'linear' moves at a constant rate, and 'smooth' slows at each end, which is what most camera moves want.
Speed
Under 'Playback', 'Speed' sets how fast the clip runs. Above 1.00x is faster and shorter, below is slower and longer.
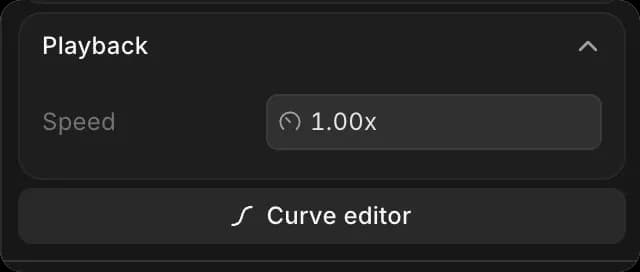
'Curve editor' lets the speed change across the clip instead of staying flat, so a shot can ease into slow motion rather than switching to it.
For a quick change, the 'Speed' tool (E) on the tool bar does the same thing by dragging a clip's edge. See Cut and arrange.
Using Copilot
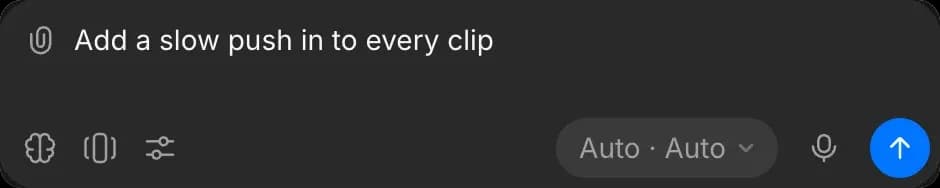
Setting the same move on a run of clips is slow by hand. Try 'add a slow push in to every clip', 'scale these up ten percent', or 'fade this one in over half a second'.
Effects such as blur, sharpen, film grain, glow, vignette and green-screen keying are under 'Effects' in the 'Adjust' tab. See Color.
Tips
- Two keyframes make most moves. Add a third only if the motion changes direction.
- Scale above 100% on a clip smaller than your project resolution will look soft. Ask Copilot to upscale it first.
- Clicking a video clip also selects its sound. Press Shift + Cmd + L to unlink them and move one without the other.
That's how you frame and animate a clip in Compose on Morphic. Use it when a shot is right but sits wrong in the frame.
If you have any trouble or have any questions, feel free to reach out. We're happy to help. Write to us at support@morphic.com.