> For the complete documentation index, see [llms.txt](https://morphic.com/docs/llms.txt). Markdown versions of documentation pages are available by appending `.md` to page URLs; this page is available as [Markdown](https://morphic.com/docs/zh/how-tos/storyboarding/storyboarding-using-a-grid.md).

# 使用网格制作分镜

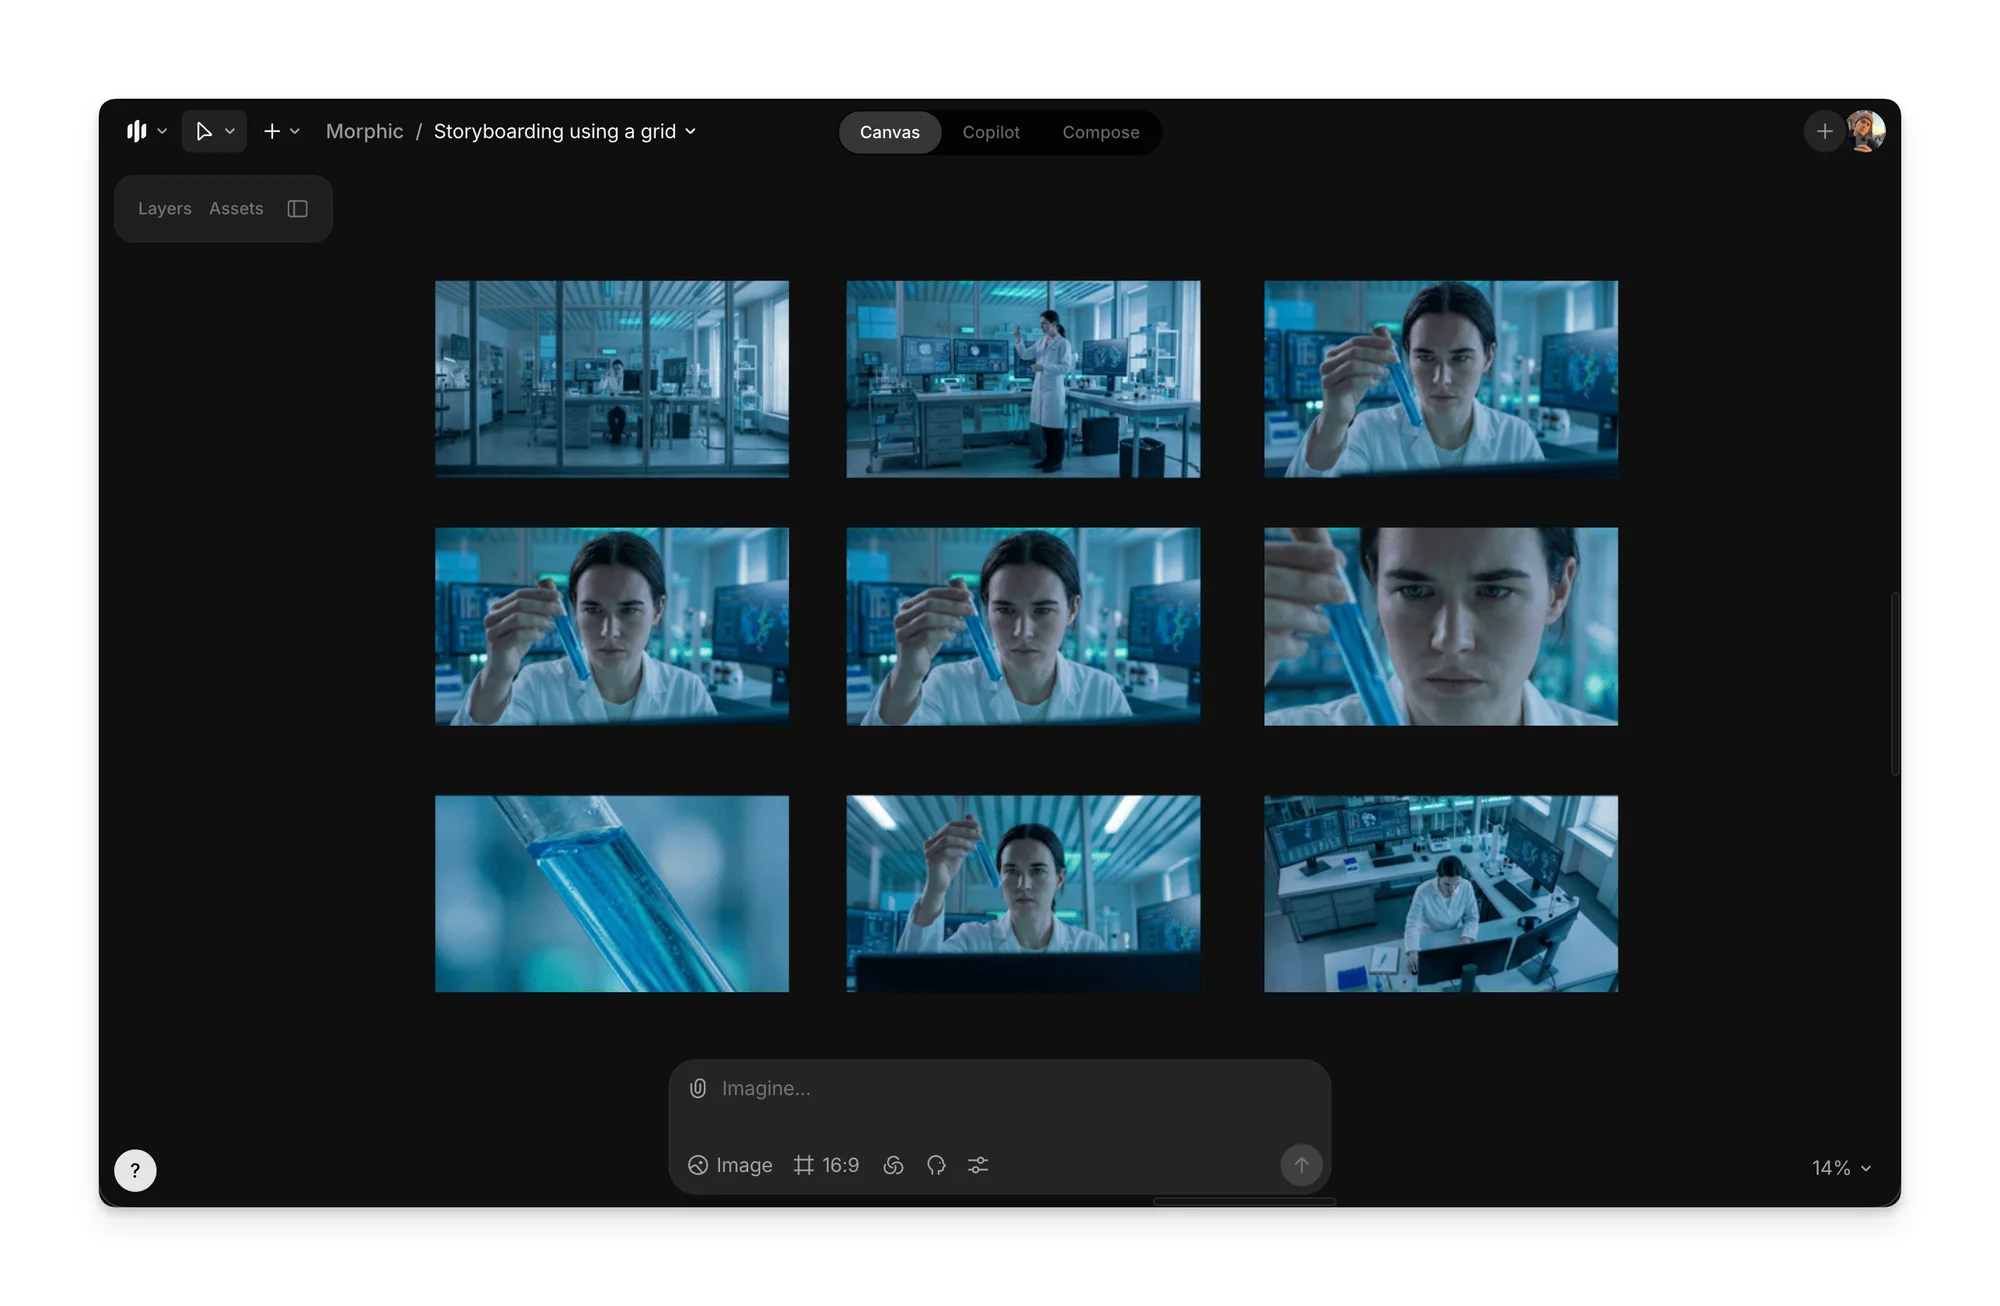
使用网格制作分镜会将一个场景拆分为多个画面以便进行覆盖规划。这让你在保持主体、环境和光线一致的同时探索不同的镜头构图。

以下是在 Morphic 上使用网格创建分镜脚本的分步指南：

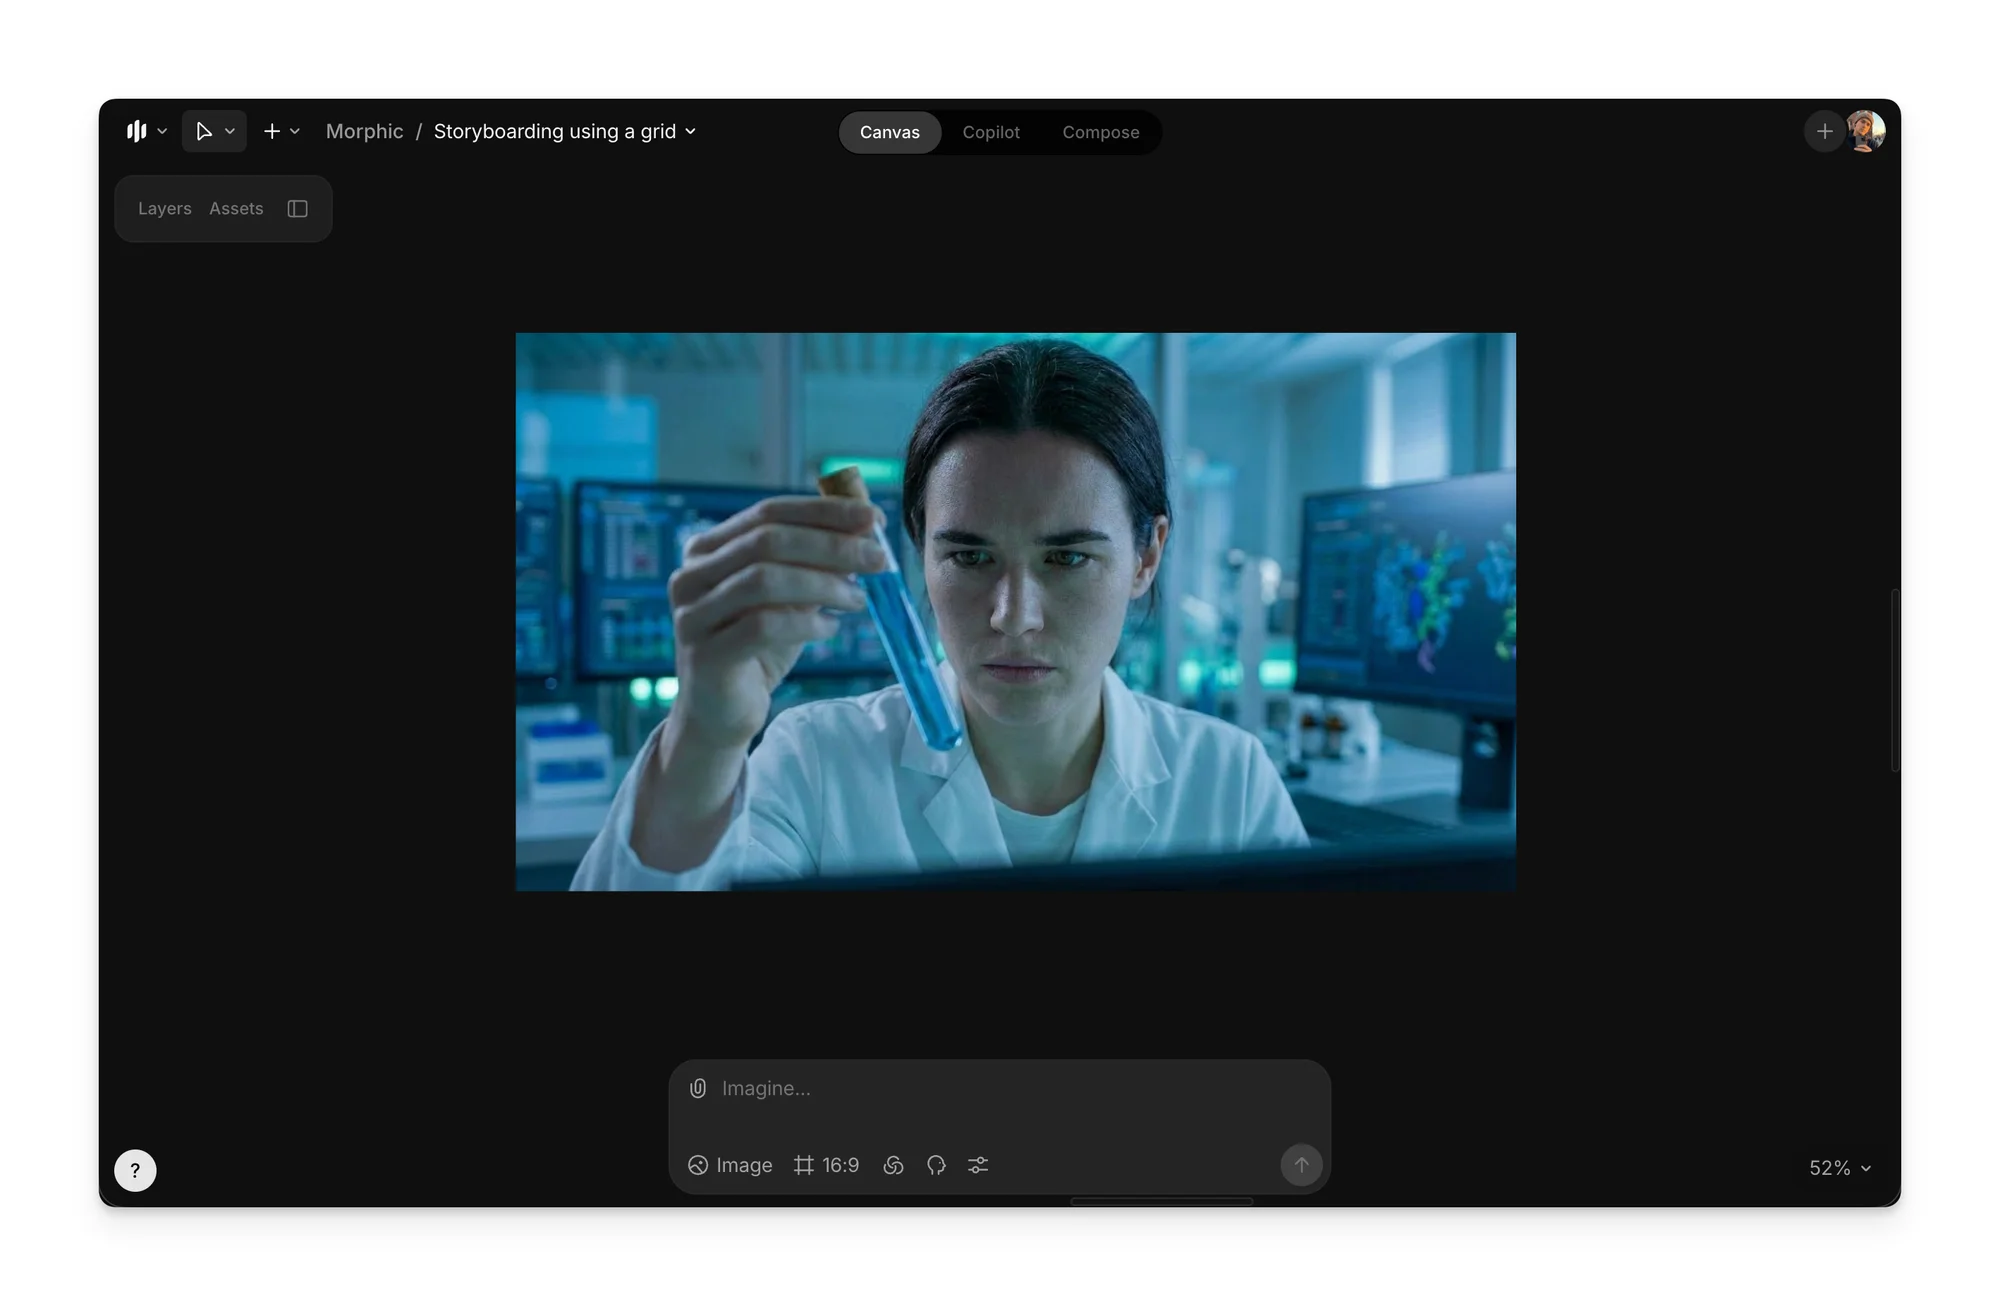
1. 创建起始画面\
   a. 打开画布，上传一张参考图像，或使用详细提示词生成初始画面\
   b. 确保主体、环境和光照都被清晰定义，因为这个起始画面会作为整个网格的锚点

<figure><img src="https://2197859893-files.gitbook.io/~/files/v0/b/gitbook-x-prod.appspot.com/o/spaces%2FoPhHCbNZdzW70rakoLhf%2Fuploads%2Fa2iTLVcxDxfGDHqgnjUA%2FCleanShot%202026-01-13%20at%2012.23.52%402x.png?alt=media&amp;token=b166c6a1-080b-4224-8b59-9a62c64dd534" alt=""><figcaption></figcaption></figure>

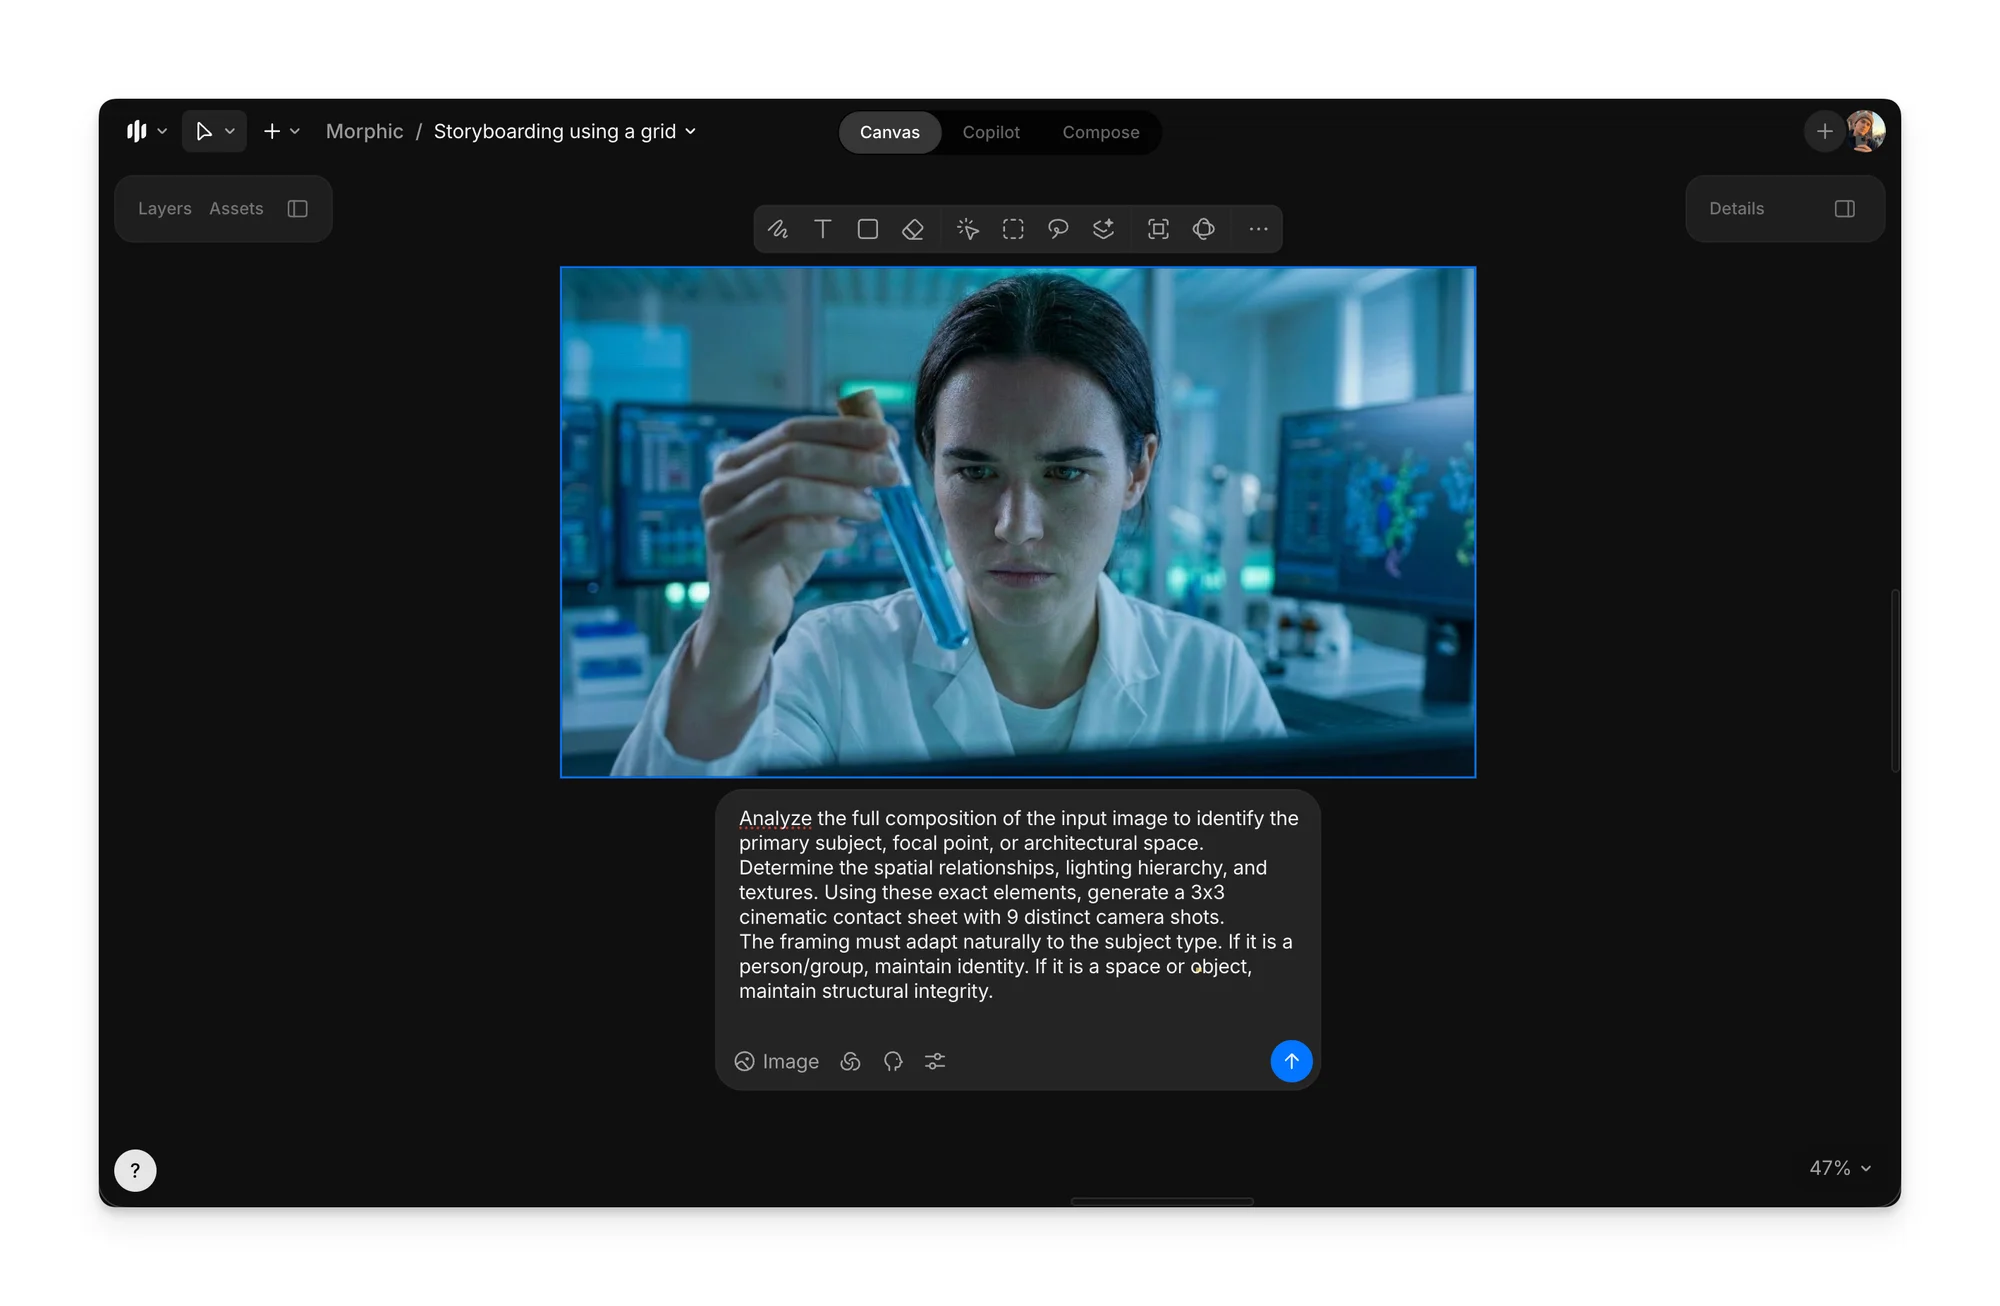
2. 生成 3×3 电影感网格\
   a. 在画布中选中起始画面\
   b. 将以下提示词粘贴到提示栏中

<figure><img src="https://2197859893-files.gitbook.io/~/files/v0/b/gitbook-x-prod.appspot.com/o/spaces%2FoPhHCbNZdzW70rakoLhf%2Fuploads%2FWjEHok6uSYELQFyp7IMp%2FCleanShot%202026-01-13%20at%2012.25.16%402x.png?alt=media&amp;token=37d563c4-703d-4c59-94f5-69740fba21dd" alt=""><figcaption></figcaption></figure>

```
分析输入图像的整体构图，识别主要主体、焦点或建筑空间。 
确定空间关系、光照层次和纹理。使用这些准确元素，生成一个包含 9 个不同镜头的 3x3 电影感联系表。 
构图必须根据主体类型自然调整。如果是人物/群体，要保持身份一致。如果是空间或物体，要保持结构完整性。
第一行：背景与尺度
- 极远景：呈现主体或建筑在更大环境/景观中的极小比例视图。
- 远景：主体的全身视图（从头到脚），或完整的建筑结构/房间（从地板到天花板）。
- 中远景：平衡的构图，展示主要主体并保留显著的背景环境（例如美国镜头或建筑 3/4 视图）。
第二行：核心焦点
- 中景：构图聚焦于主体的中心部分或空间的核心功能，在细节与背景之间取得平衡。
- 中近景：对主体最具表现力的部分进行更紧凑的取景（例如胸部以上），或某个特定的家具布置/建筑特征。
- 近景：将主要焦点隔离出来（例如面部、车灯或复杂的设计元素），以捕捉情感或工艺细节。
第三行：纹理与视角
- 特写：对某种特定纹理、材质、眼睛或微小细节进行微距聚焦，使所有背景都模糊化。
- 仰拍：从地面水平向上拍摄，强调高度、压迫感或天花板细节。
- 俯拍：从上方拍摄，向下看以展示布局、平面图或脆弱感。
限制条件：
请在全部九个画面中保持严格一致性。主体内容、纹理、环境和光照都必须保持不变。
景深应自然调整：宽景使用深景深，近景使用浅景深（背景虚化）。
结果必须是一个专业的 3x3 电影感分镜网格。
生成 4K 分辨率的图像。
```

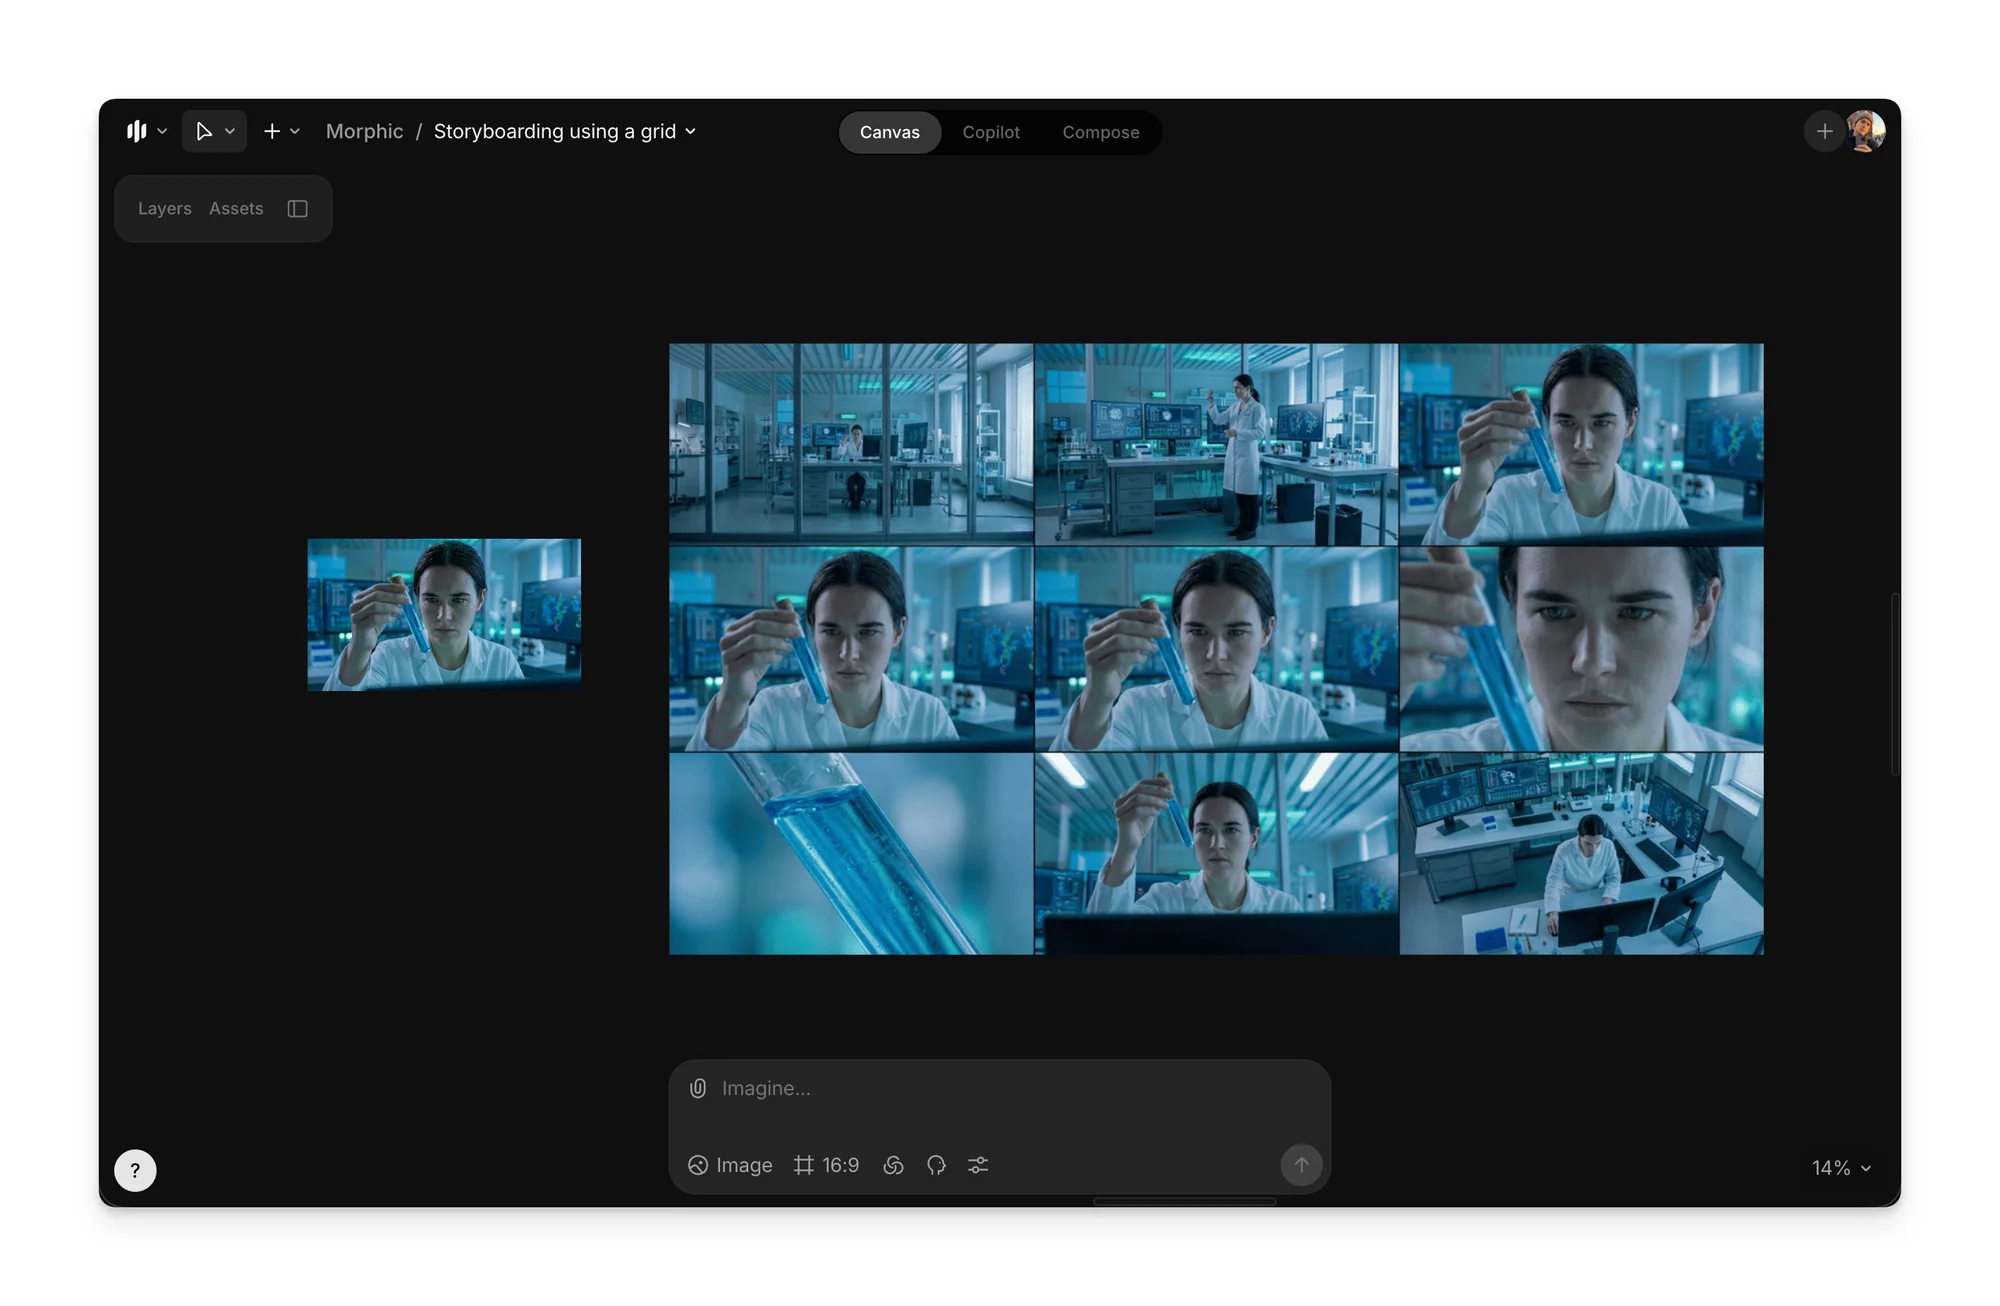
c. 点击提示栏中的蓝色按钮，创建一张包含九个不同镜头的单张图像

<figure><img src="https://2197859893-files.gitbook.io/~/files/v0/b/gitbook-x-prod.appspot.com/o/spaces%2FoPhHCbNZdzW70rakoLhf%2Fuploads%2FjhLfA0zfRHdbMXix1C49%2FCleanShot%202026-01-13%20at%2012.27.33%402x.png?alt=media&amp;token=4771fbd0-3f63-436e-b55b-c5e8649b0164" alt=""><figcaption></figcaption></figure>

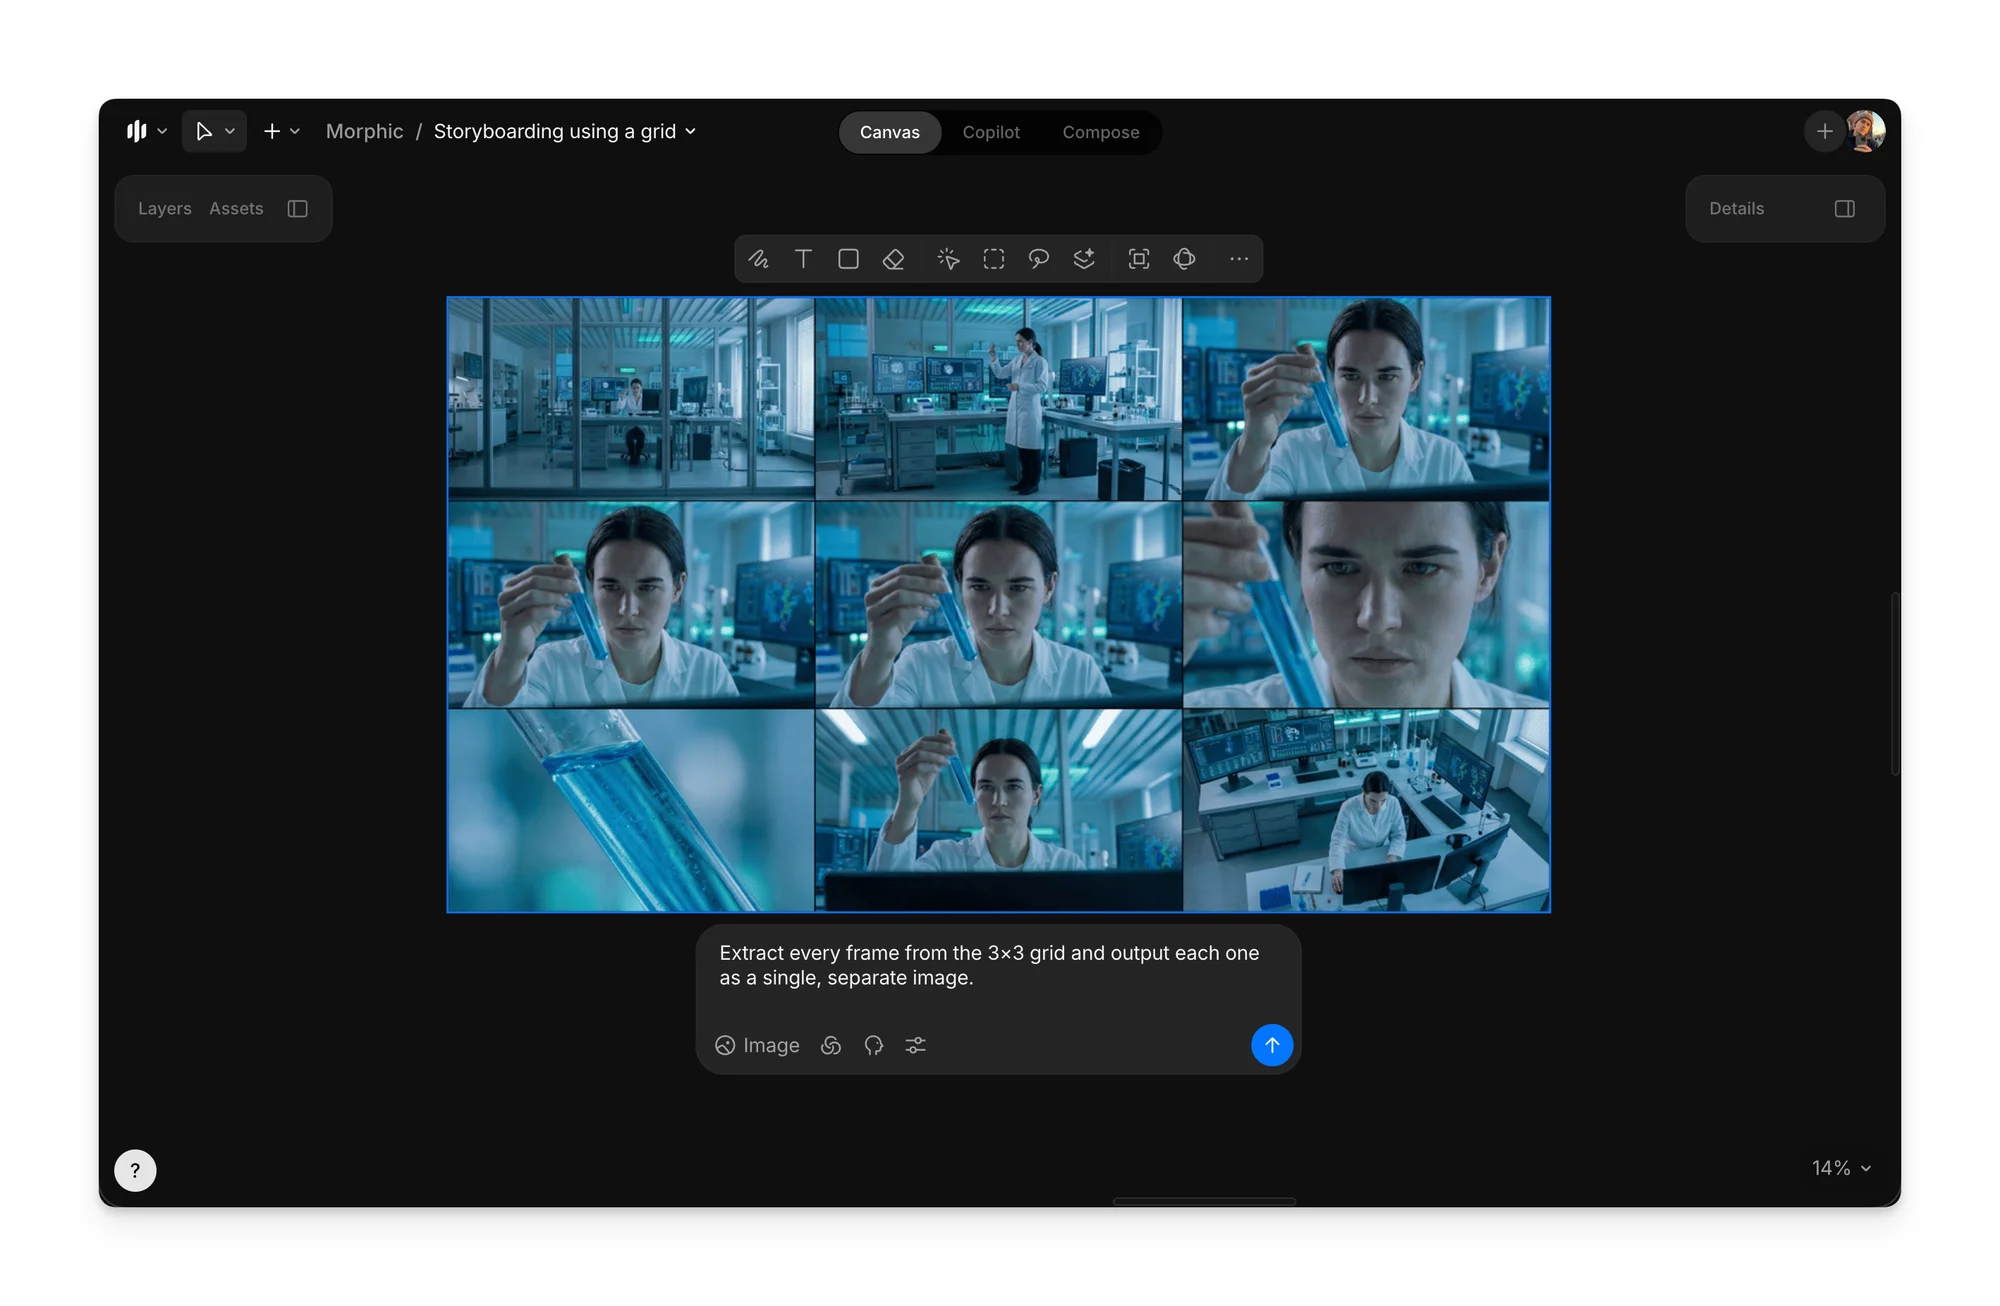
3. 提取单独的分镜画面\
   a. 选中 3×3 网格图像\
   b. 粘贴以下画面提取提示词，将 3x3 网格拆分为单独的画面

<figure><img src="https://2197859893-files.gitbook.io/~/files/v0/b/gitbook-x-prod.appspot.com/o/spaces%2FoPhHCbNZdzW70rakoLhf%2Fuploads%2FwMj9vABrMK8DpTigqZAV%2FCleanShot%202026-01-13%20at%2012.28.29%402x.png?alt=media&amp;token=d3029f4d-ffae-4e12-a658-77993ef1bb4a" alt=""><figcaption></figcaption></figure>

```
从 3×3 网格中提取每一帧，并将每一帧分别输出为单独的图像。
```

4. 使用提取出的画面来增加运动、节奏或转场

<figure><img src="https://2197859893-files.gitbook.io/~/files/v0/b/gitbook-x-prod.appspot.com/o/spaces%2FoPhHCbNZdzW70rakoLhf%2Fuploads%2FgUsj7J5GCMQYAWzxS4Xl%2FCleanShot%202026-01-13%20at%2012.30.35%402x.png?alt=media&amp;token=b9a8643d-e225-4f16-b63c-474b659cfd4d" alt=""><figcaption></figcaption></figure>

这就是在 Morphic 上使用网格进行分镜的方法。这有助于你以清晰、有结构的方式规划一个场景在不同镜头中的呈现。

***

如果您遇到任何问题或有任何疑问，欢迎随时联系我们。我们很乐意为您提供帮助。请写信至 [**support@morphic.com**](mailto:support@morphic.com)**.**


---

# Agent Instructions
This documentation is published with GitBook. GitBook is the documentation platform designed so that both humans and AI agents can read, navigate, and reason over technical content effectively. Learn more at gitbook.com.

## Querying This Documentation
If you need additional information that is not directly available in this page, you can query the documentation dynamically by asking a question.

Perform an HTTP GET request on the current page URL with the `ask` query parameter, and the optional `goal` query parameter:

```
GET https://morphic.com/docs/zh/how-tos/storyboarding/storyboarding-using-a-grid.md?ask=<question>&goal=<endgoal>
```

`ask` is the immediate question: it should be specific, self-contained, and written in natural language.
`goal` is optional and describes the broader end goal you are ultimately trying to accomplish on behalf of the user. GitBook uses it to tailor the answer towards what is most useful for that goal.

The response will contain a direct answer to the question and relevant excerpts and sources from the documentation.

Use this mechanism when the answer is not explicitly present in the current page, you need clarification or additional context, or you want to retrieve related documentation sections.