What an HDR conversion gets you
| What changes | What it looks like | Why you care |
|---|---|---|
| The file passes delivery checks | Your export is accepted instead of bounced | Most broadcast and streaming specs refuse the 8-bit files most AI video models produce |
| Highlights get room to separate | Bright areas that still hold detail stop sharing one flat step | Separation in the highlights is what makes an image look expensive |
| Gradients survive a grade | A sunset holds together when you push it instead of breaking into stripes | New banding is the most common thing that makes good footage look cheap |
| A compositor can use the shot | Your generated clip sits in the same scene as live action | Linear frames are what a compositing package expects to be handed |
How Ruby converts SDR to HDR
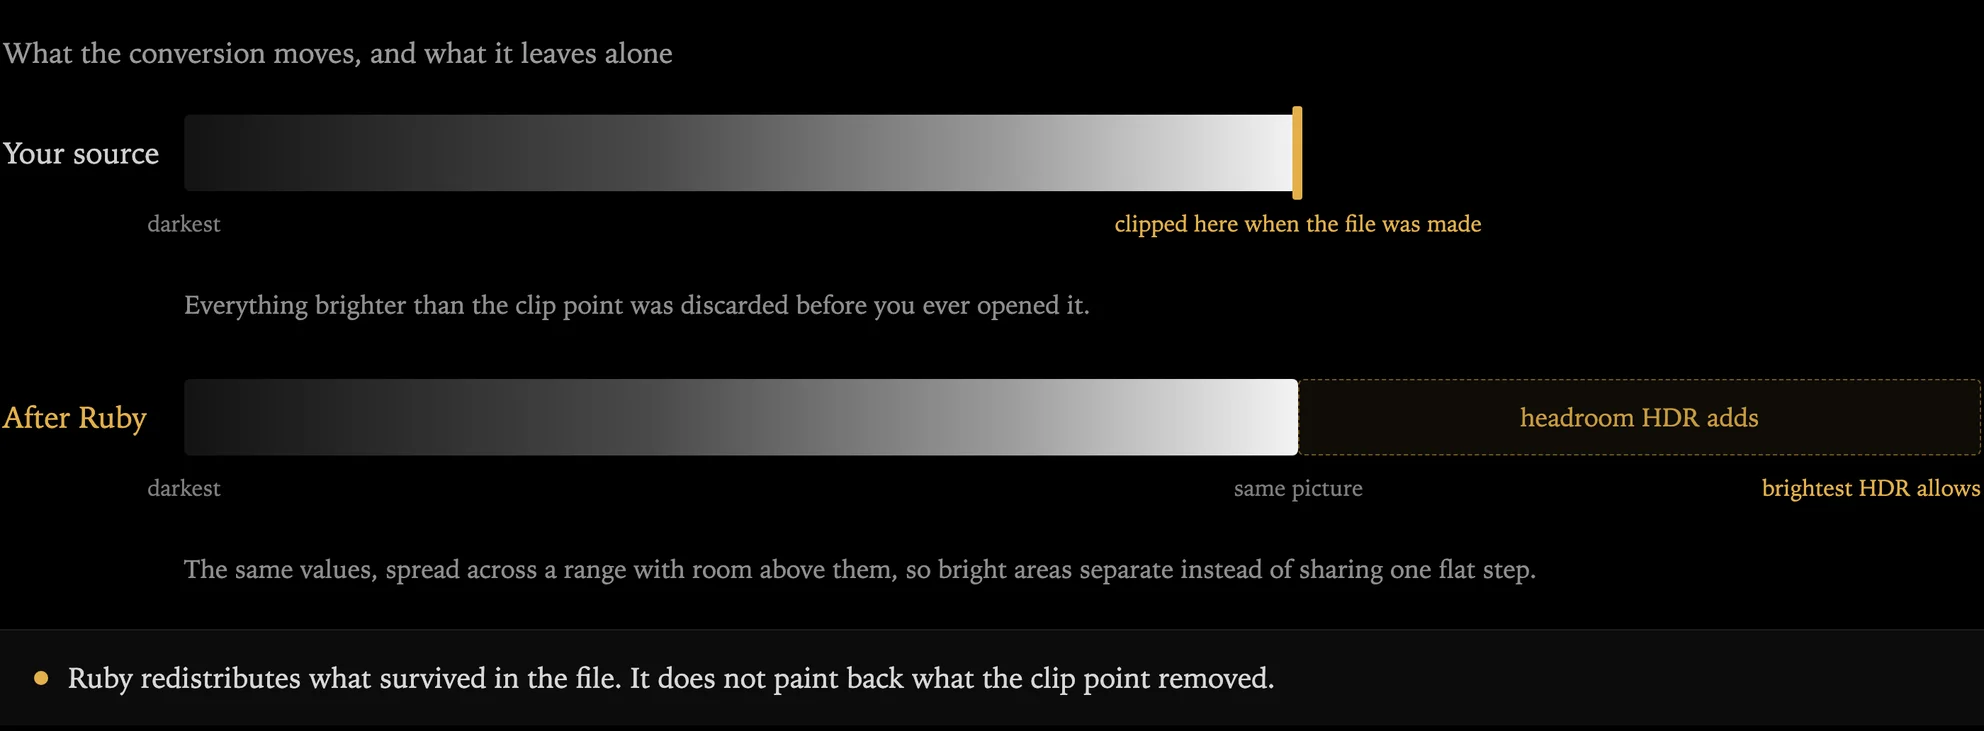
Most video files carry 256 brightness steps per colour, and everything past a certain point is simply clamped. HDR files are built with far more room, both in steps and in how bright the brightest step is allowed to be.
Ruby maps your footage into that larger container. It works out how the brightness in each frame should be redistributed once there is headroom above it, applies that as a bounded grade, and writes the result with the colour information a player needs to read it as HDR.
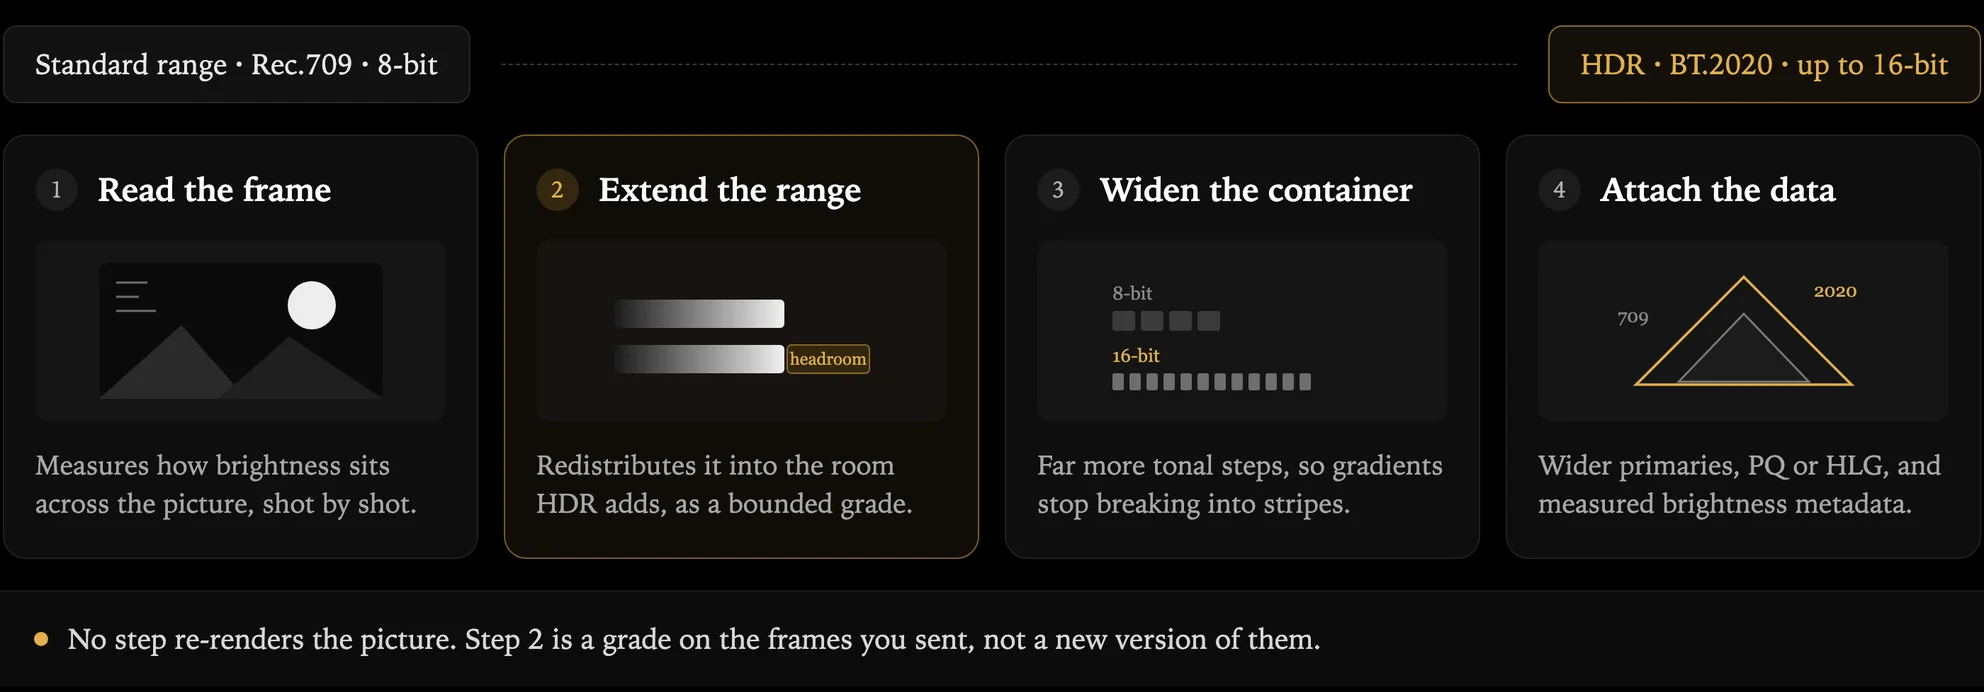
The important part is what it does not do. The frames are not re-rendered, so nothing in the shot is redrawn, moved or invented. Runway describes the grade as bounded and colour-preserving, which in practice means the picture you approved is the picture you get back, sitting in a bigger container. Your audio comes through untouched and in sync.
That restraint is the whole design. A model that regenerates frames can produce a more dramatic result and a less trustworthy one, because the shot that comes back is not quite the shot that was signed off.
It also sets the limit. Detail that was clipped when the file was first written is gone, and a grade that invents nothing cannot bring it back: three blown highlights that already share one value still share it afterwards, in a container with more room above them. What you gain is headroom for the highlights that survived, and a file that holds together when someone grades it.
One practical caveat before you send anything to a delivery spec: output dimensions can be cropped to a multiple of 16, so a 1920x1080 source can come back 1920x1072. Check the result against the spec you are delivering to rather than assuming the frame size is untouched.
Start with a clean source
The conversion carries through whatever it is given, so a few minutes here saves a wasted pass.
| Check | What you want | If it is wrong |
|---|---|---|
| Dynamic range | A standard range file | Footage already carrying HDR information is turned away, so convert once and keep the master |
| Quality of the copy | The original export, not a re-download | Compression damage gets carried into the wider container along with the real detail |
| Length and size | Up to 30 seconds, under 4096 pixels per side | Longer or larger sources need to be split before conversion |
| Order of work | Clean up, upscale and edit before converting | Doing it afterwards means processing much bigger files for a worse result |
Which HDR file to ask for
Four paths, and the choice is only ever about where the footage is going next.
Ask for EXR if it is going to a compositor. The frames arrive in linear light, which is the form a compositing package expects, and the colour information travels with them.
Ask for ProRes if a person is going to edit or grade it. That is the master, and there are three tiers of it depending on how much headroom the grade needs.
Ask for HDR10 if someone is just going to watch it. It is the default for a reason: a finished 10-bit file with the brightness data already measured rather than guessed.
Ask for HLG if it is going to a broadcaster, or anywhere a file has to look correct on standard screens as well as HDR ones.
The longer version of this decision, including why the file you work in should not be the file you deliver, is on ProRes vs EXR vs H.265.
When to skip it
- Footage that is already HDR. It will be turned away rather than converted twice.
- Very dark or heavily blown-out shots. There is little left in the file for the conversion to redistribute.
- Heavily compressed downloads. Go back to the original export if you can.
- Anything longer than 30 seconds, or 4096 pixels or more on a side, until it is split down.
- Work that is not finished. Convert last, after the cut, the cleanup and the upscale.
Your HDR export will probably look grey and flat when you open it. That is almost always the player, not the file: most browsers, standard media players and editing timelines cannot display HDR properly. Check it on an HDR screen in a player that supports it before deciding something went wrong.
FAQs
It converts a standard range video into a genuine HDR one. It redistributes the brightness in each frame into the headroom HDR adds, writes the result into a container with far more room for brightness and colour, and attaches the colour information that tells a player to treat it as HDR. The picture itself is not re-rendered.
Runway calls it a colour grading model, but it is not the creative grade a colourist does. Grading is a decision about how footage should look, made by a person. This is a technical change to what the file can hold and how it is signalled. A converted file still needs grading, and it grades better than the original because there is more to work with.
Only its range. The conversion is bounded and colour-preserving: nothing in the frame is redrawn, no detail is invented, and the audio passes through in sync. The shot you approved is the shot you get back, in a container with room above it.
No. There are no exposure, saturation or threshold controls to balance shot by shot. The only real decision is which of the four output files you want, and that depends entirely on where the footage is going next.
Clean, well-exposed, finished footage straight from the original export. Higher quality in means better results out, because compression damage travels into the wider container along with everything else. Run any cleanup, upscaling and editing before the conversion, not after.
Because most AI video models return a standard range file that professional delivery specs will not accept. Converting is what lets generated footage go into a real grade, a real broadcast deliverable or a real compositing shot instead of stopping at a preview.