> For the complete documentation index, see [llms.txt](https://morphic.com/docs/llms.txt). Markdown versions of documentation pages are available by appending `.md` to page URLs; this page is available as [Markdown](https://morphic.com/docs/de/how-tos/creating-motion-comics.md).

# Motion Comics erstellen

Du kannst jetzt Motion Comics erstellen und deine statischen Frames in dynamische Erzählsequenzen verwandeln. Morphic macht es einfach, den Manga-Panels Bewegung, Tempo und filmischen Fluss hinzuzufügen.

So erstellst du auf Morphic einen Motion Comic von Grund auf.

<figure><img src="https://4012032656-files.gitbook.io/~/files/v0/b/gitbook-x-prod.appspot.com/o/spaces%2FoPhHCbNZdzW70rakoLhf%2Fuploads%2FYC5E18VSbWq0FdZvG9Xs%2F1-ezgif.com-video-to-gif-converter.gif?alt=media&amp;token=d6edd4c9-9221-42ce-aab9-166e150c223f" alt=""><figcaption></figcaption></figure>

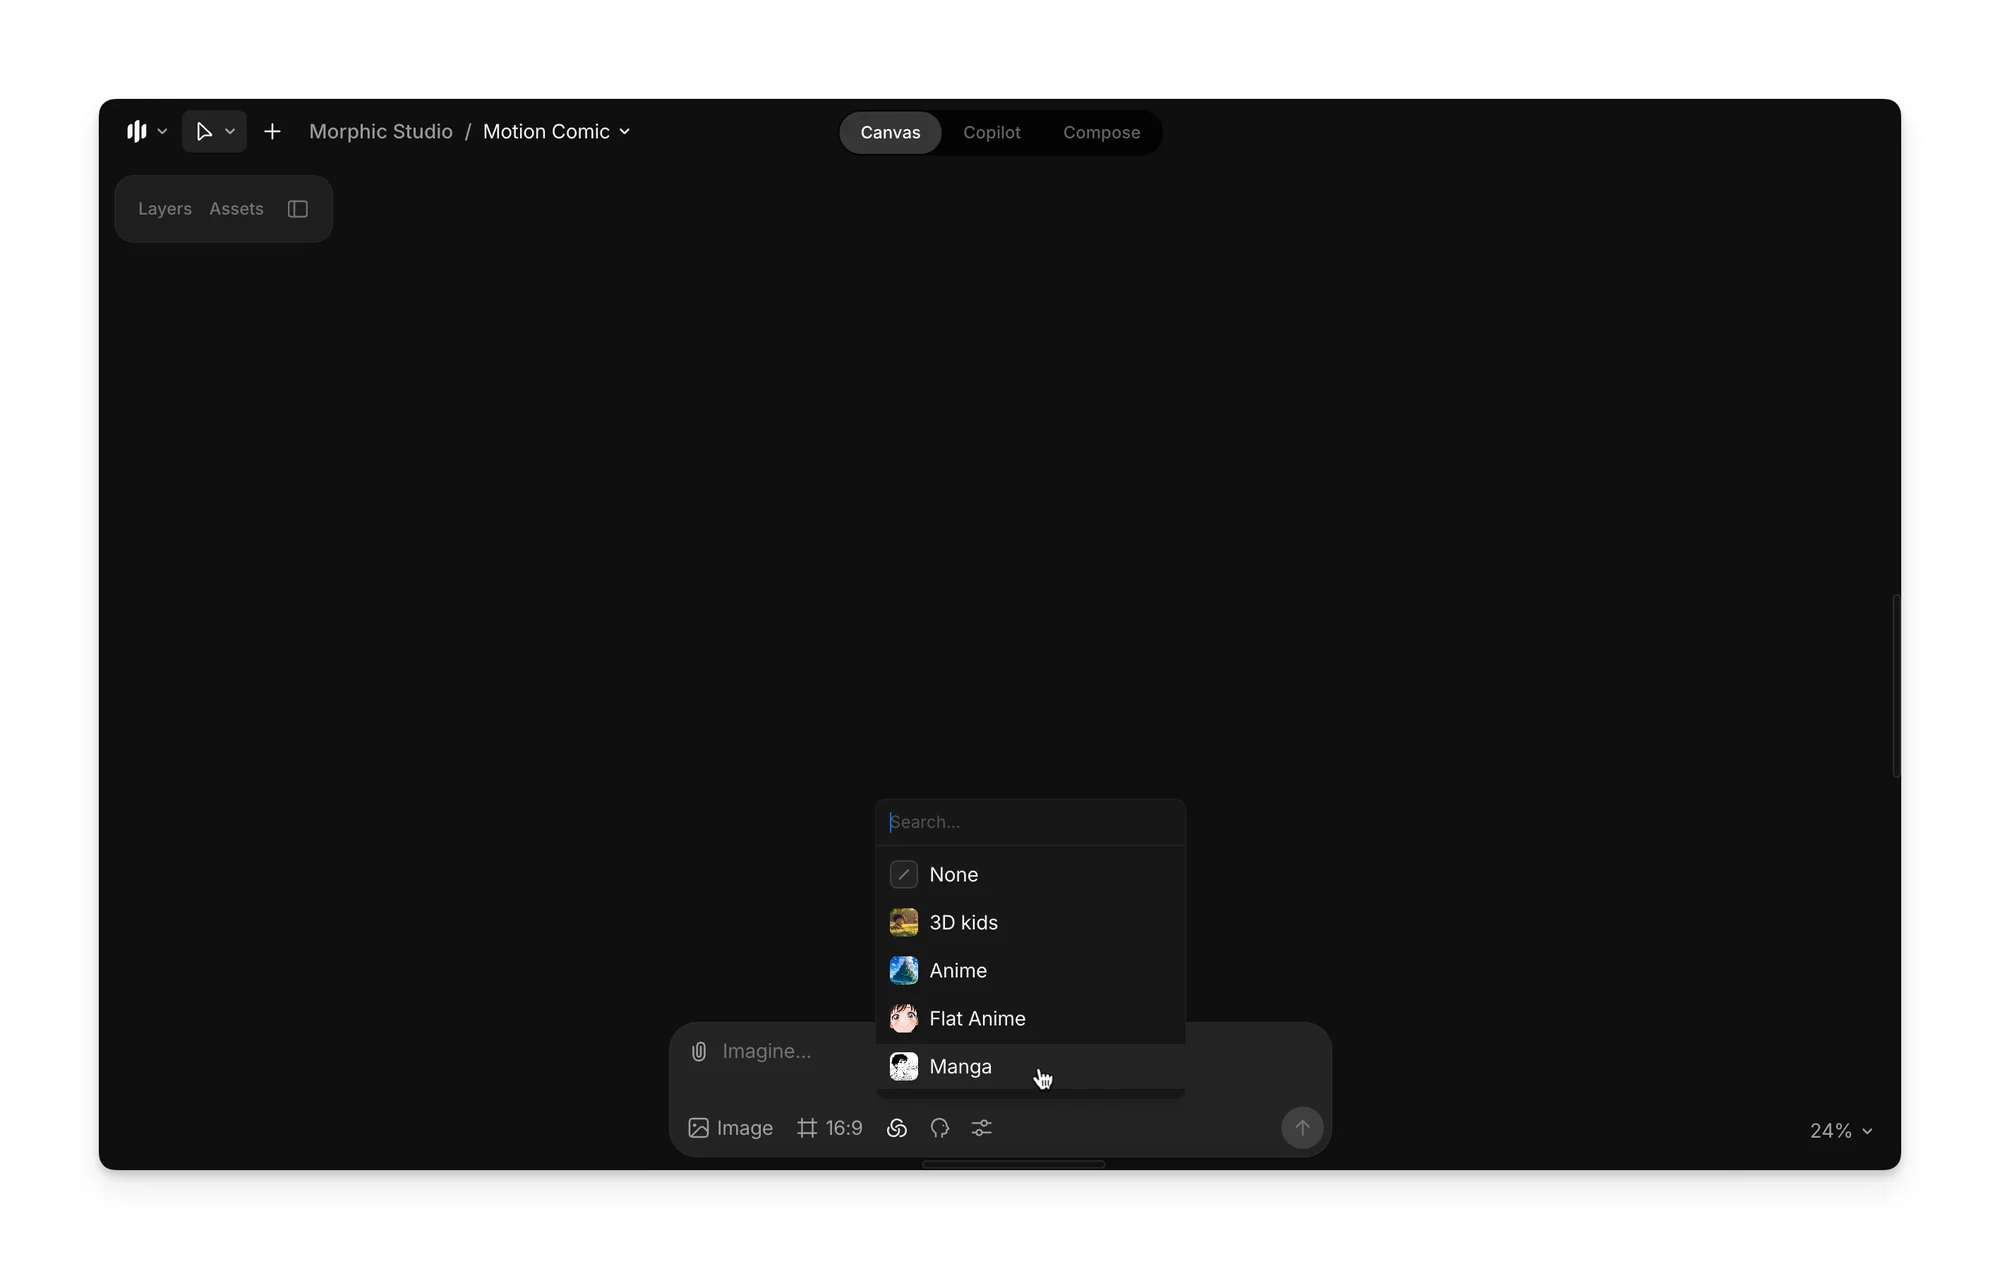
1. Wähle in der Prompt-Leiste Manga als Stilreferenz aus. Du kannst auch deine eigene [Stilreferenz](/docs/de/essentials/models.md) auswählen, wenn du eine erstellt hast.

<figure><img src="https://4012032656-files.gitbook.io/~/files/v0/b/gitbook-x-prod.appspot.com/o/spaces%2FoPhHCbNZdzW70rakoLhf%2Fuploads%2Fdbng6N8wa7dSg7SldFkP%2FCleanShot%202025-09-05%20at%2006.26.46%402x.png?alt=media&amp;token=3c497182-50e4-45ce-9fec-abec5396c6b9" alt=""><figcaption></figcaption></figure>

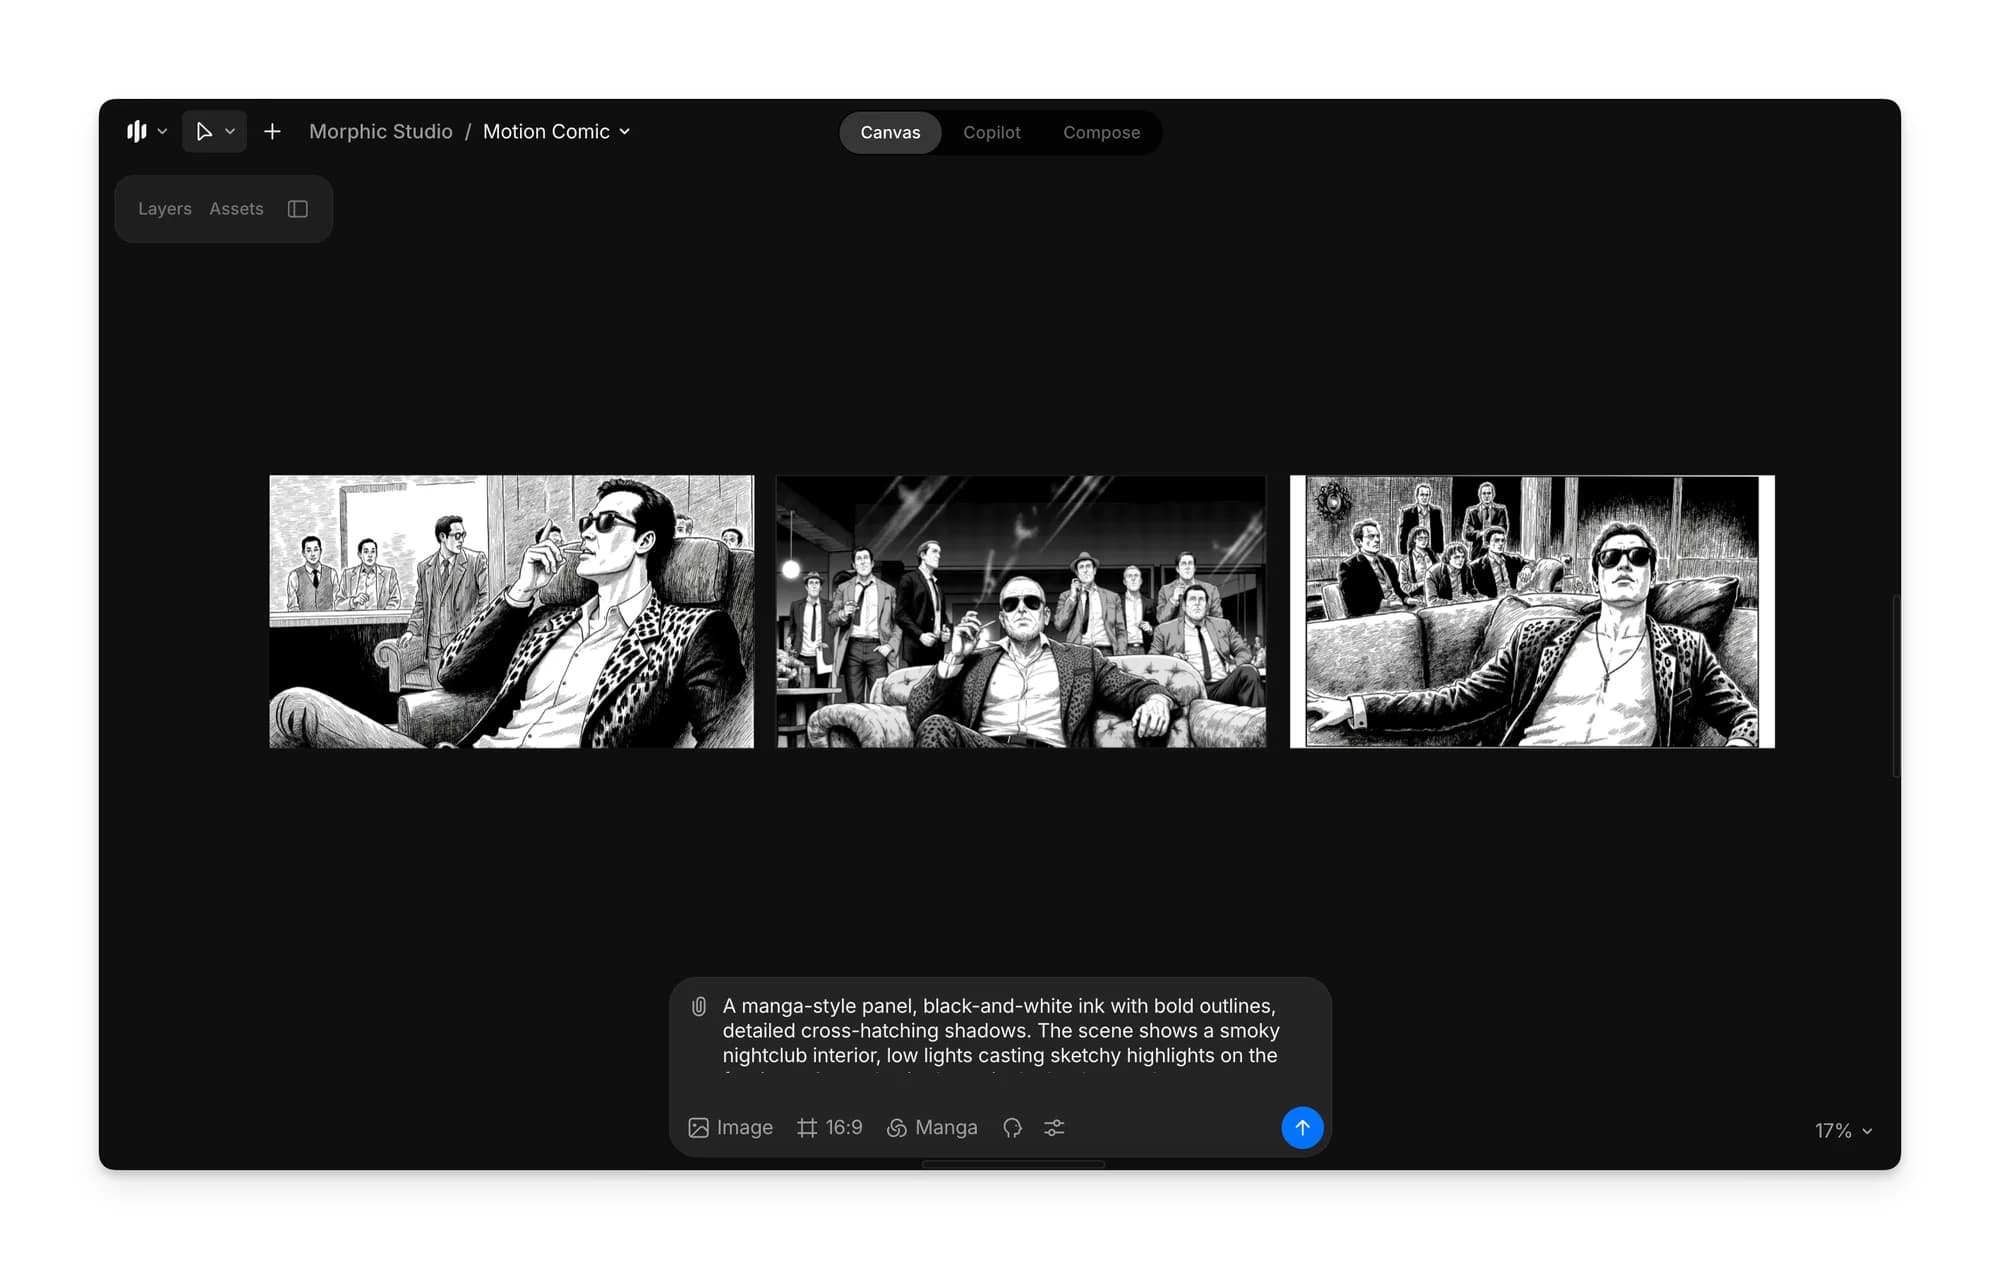
2. Gib einen Prompt ein, um die Bilder für deinen Motion Comic zu generieren, und klicke dann auf den blauen Button in der Prompt-Leiste.

<figure><img src="https://4012032656-files.gitbook.io/~/files/v0/b/gitbook-x-prod.appspot.com/o/spaces%2FoPhHCbNZdzW70rakoLhf%2Fuploads%2FSOuu10ShNCIaUvXVukWe%2FCleanShot%202025-09-05%20at%2006.27.52%402x.png?alt=media&amp;token=36a51942-4464-4cef-8f34-3f48881160c9" alt=""><figcaption></figcaption></figure>

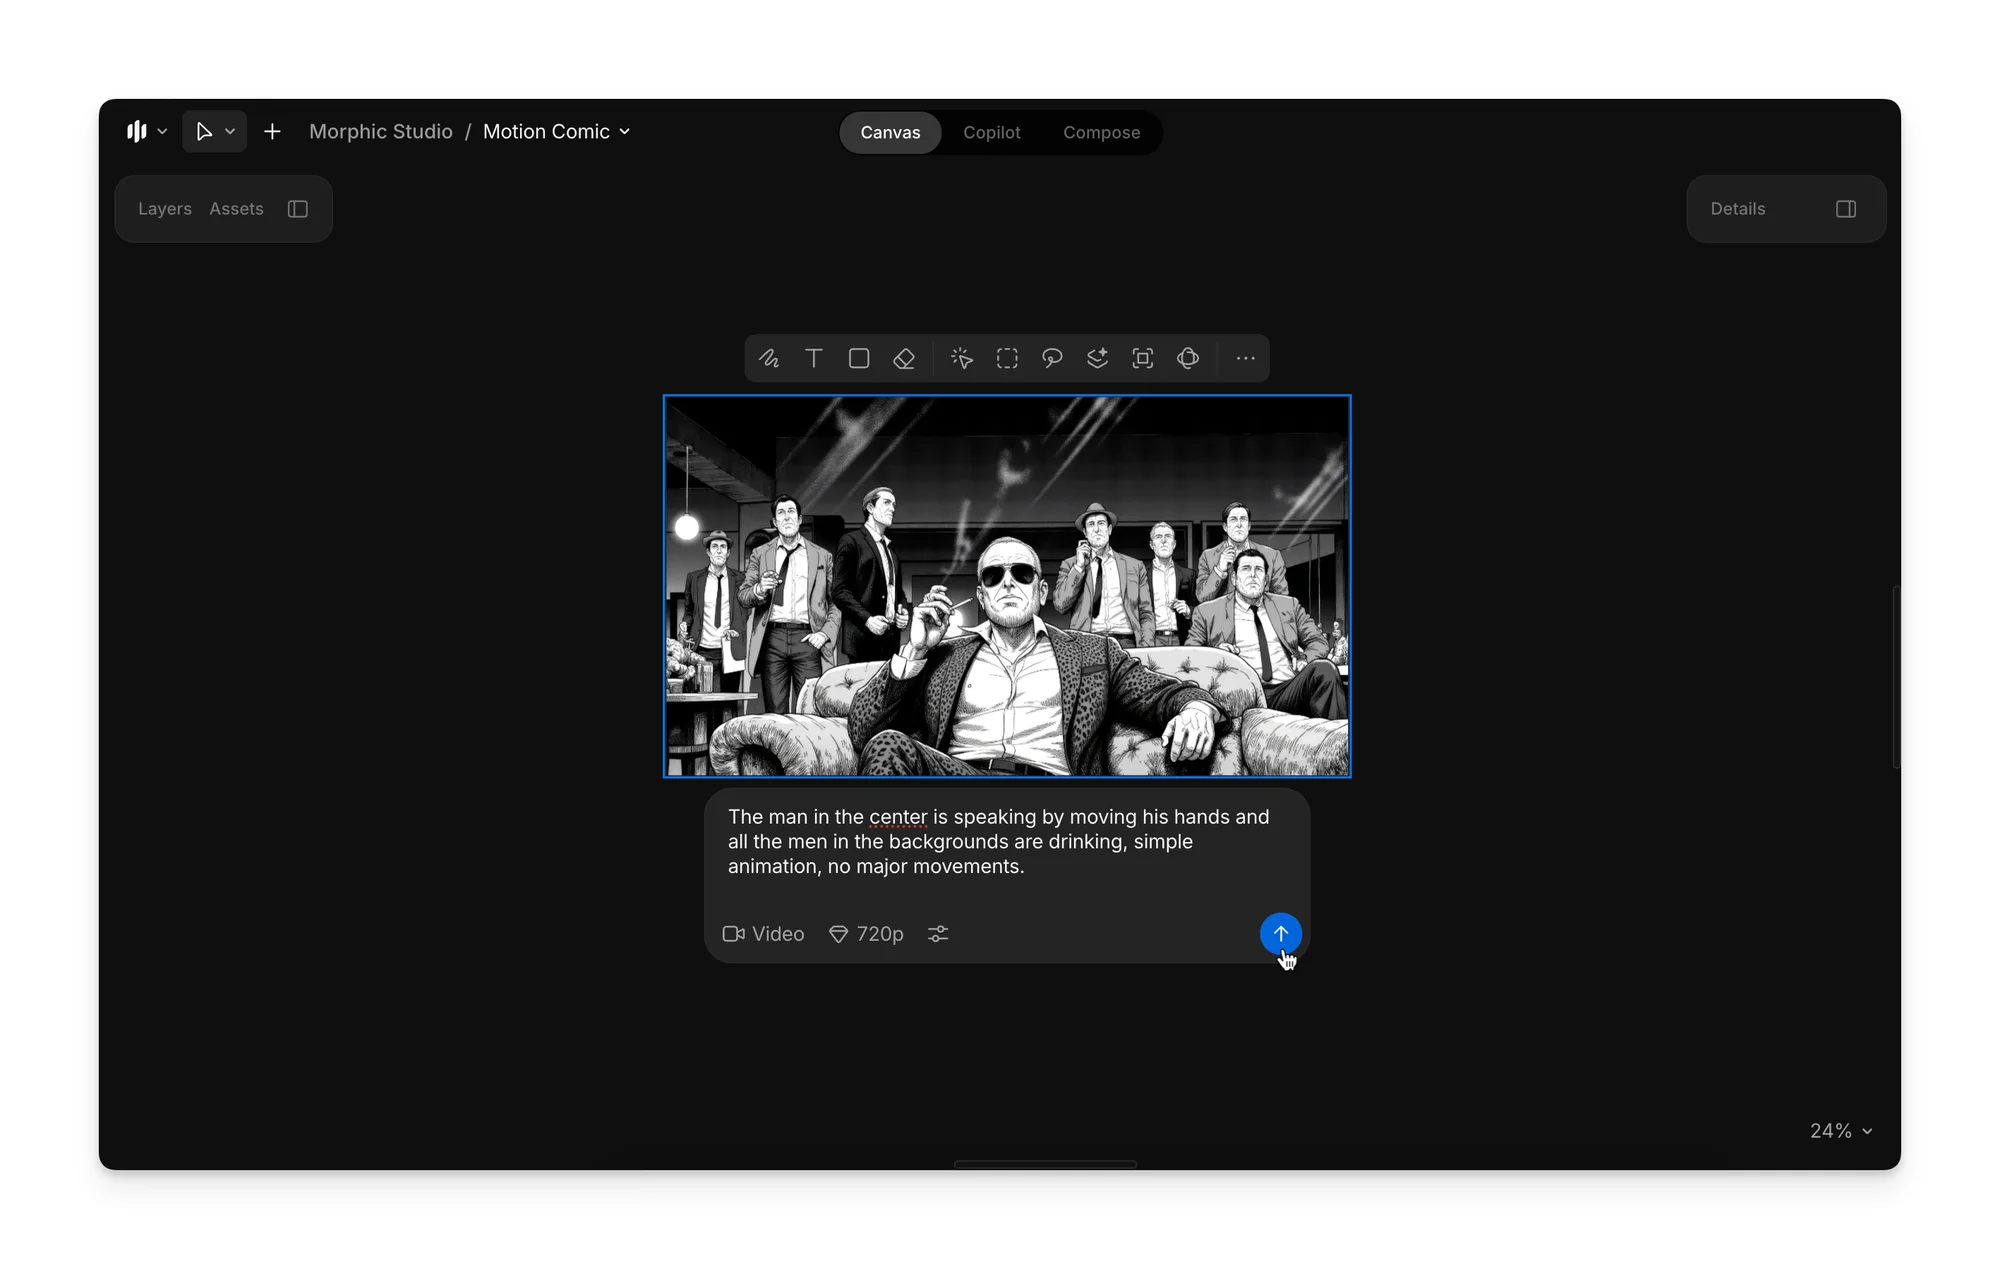
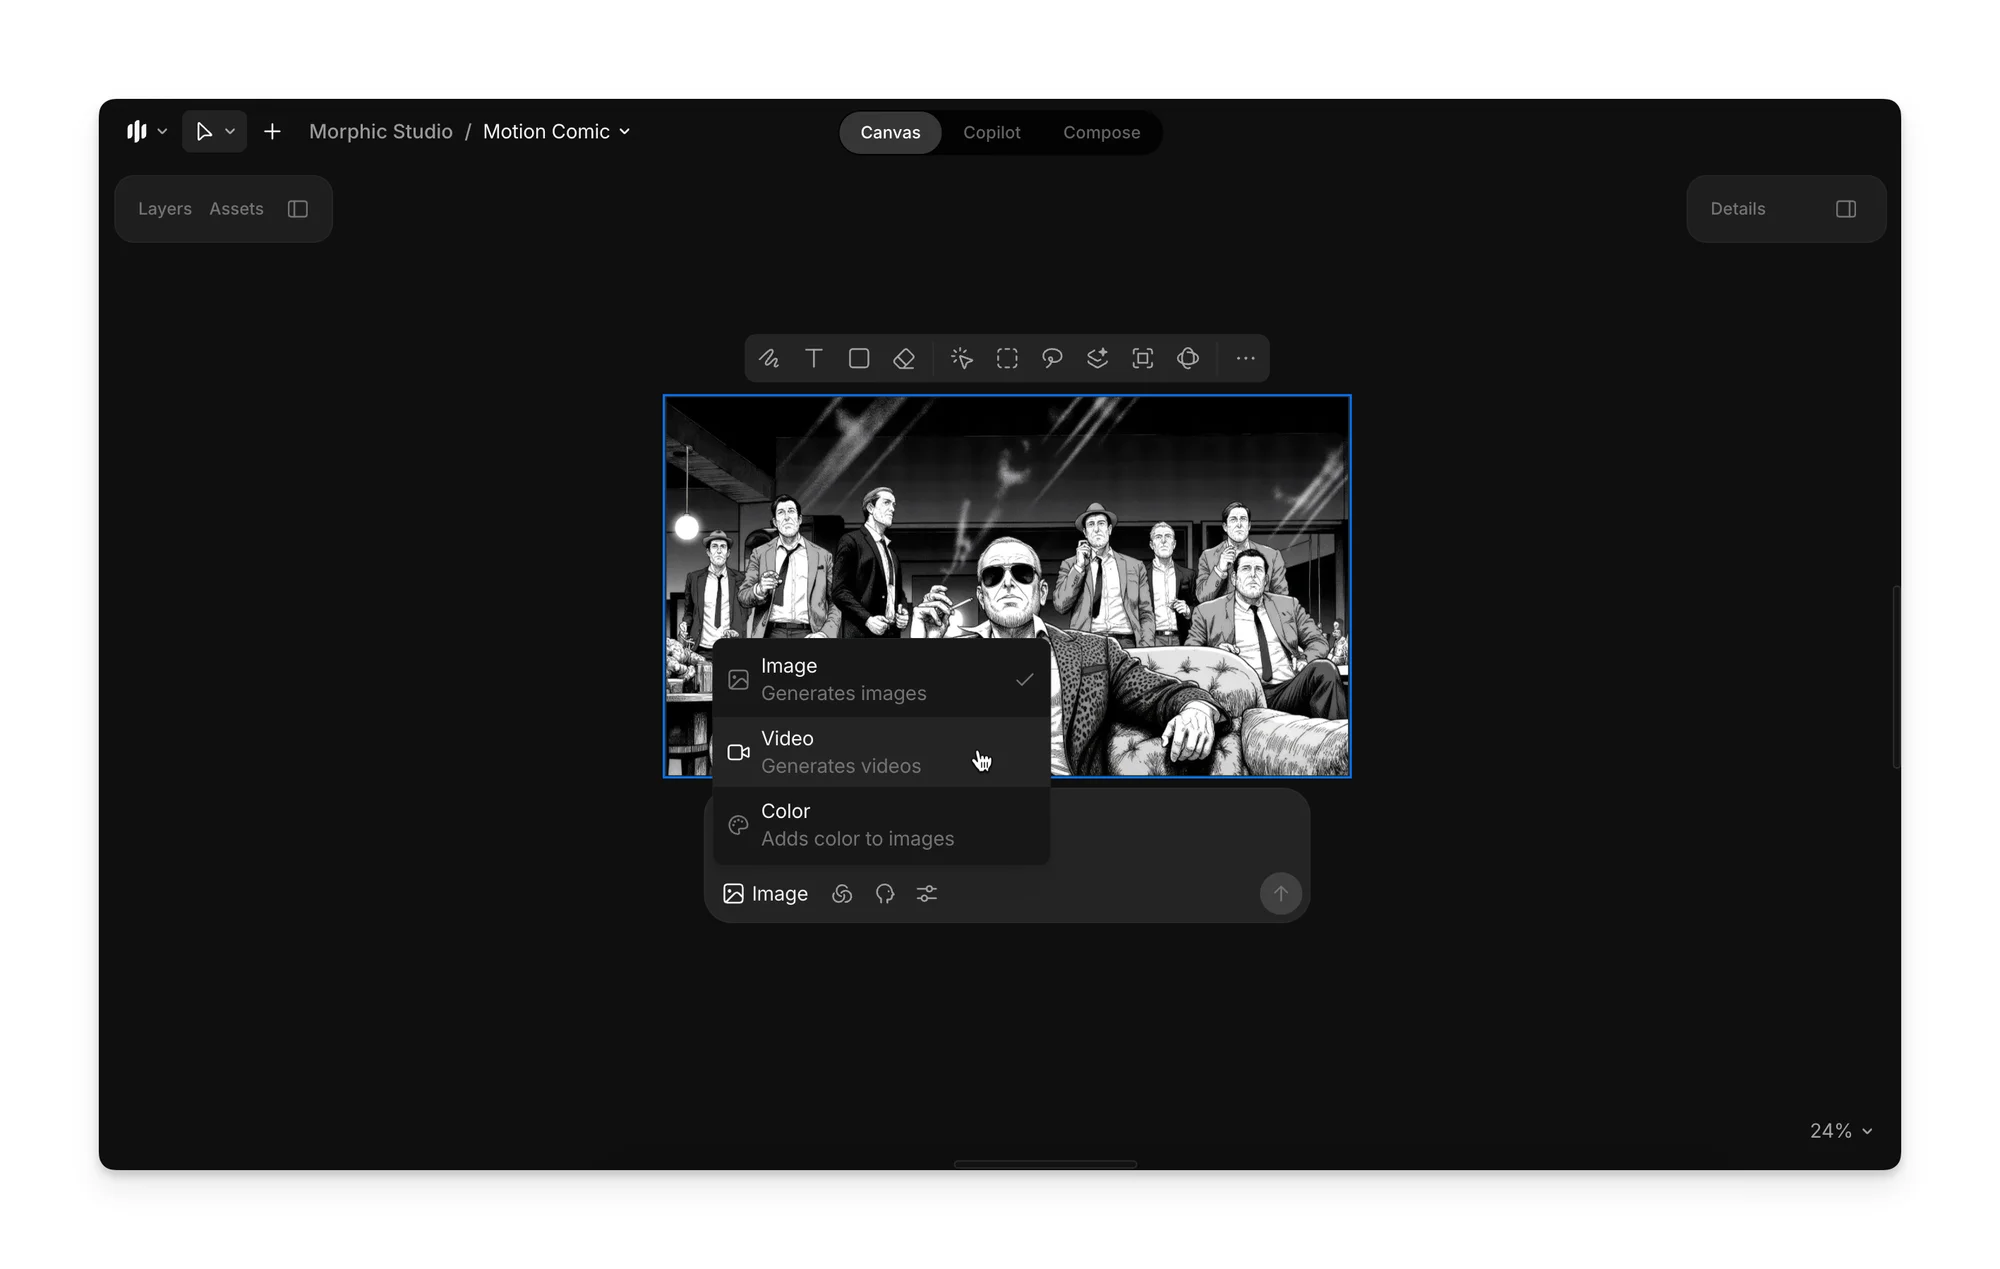
3. Sobald du ein Bild ausgewählt hast, mit dem du fortfahren möchtest, wähle es aus und wechsle in den Videomodus.
<figure><img src="https://4012032656-files.gitbook.io/~/files/v0/b/gitbook-x-prod.appspot.com/o/spaces%2FoPhHCbNZdzW70rakoLhf%2Fuploads%2FgcVgkh8hUTWWUzkxQBvh%2FCleanShot%202025-09-05%20at%2006.28.46%402x.png?alt=media&amp;token=50aec3ea-8cbc-4464-b938-6e4729a25f5f" alt=""><figcaption></figcaption></figure>

4. Gib den Prompt ein, der die Animation beschreibt, die du sehen möchtest, und klicke auf den blauen Button in der Prompt-Leiste, um dein erstes Video zu erstellen.

<figure><img src="https://4012032656-files.gitbook.io/~/files/v0/b/gitbook-x-prod.appspot.com/o/spaces%2FoPhHCbNZdzW70rakoLhf%2Fuploads%2F9oe06IC67TWoXTzj465P%2FCleanShot%202025-09-05%20at%2006.30.18%402x.png?alt=media&amp;token=0e0837e5-d6ac-4a21-bf8c-9df92114afcb" alt=""><figcaption></figcaption></figure>

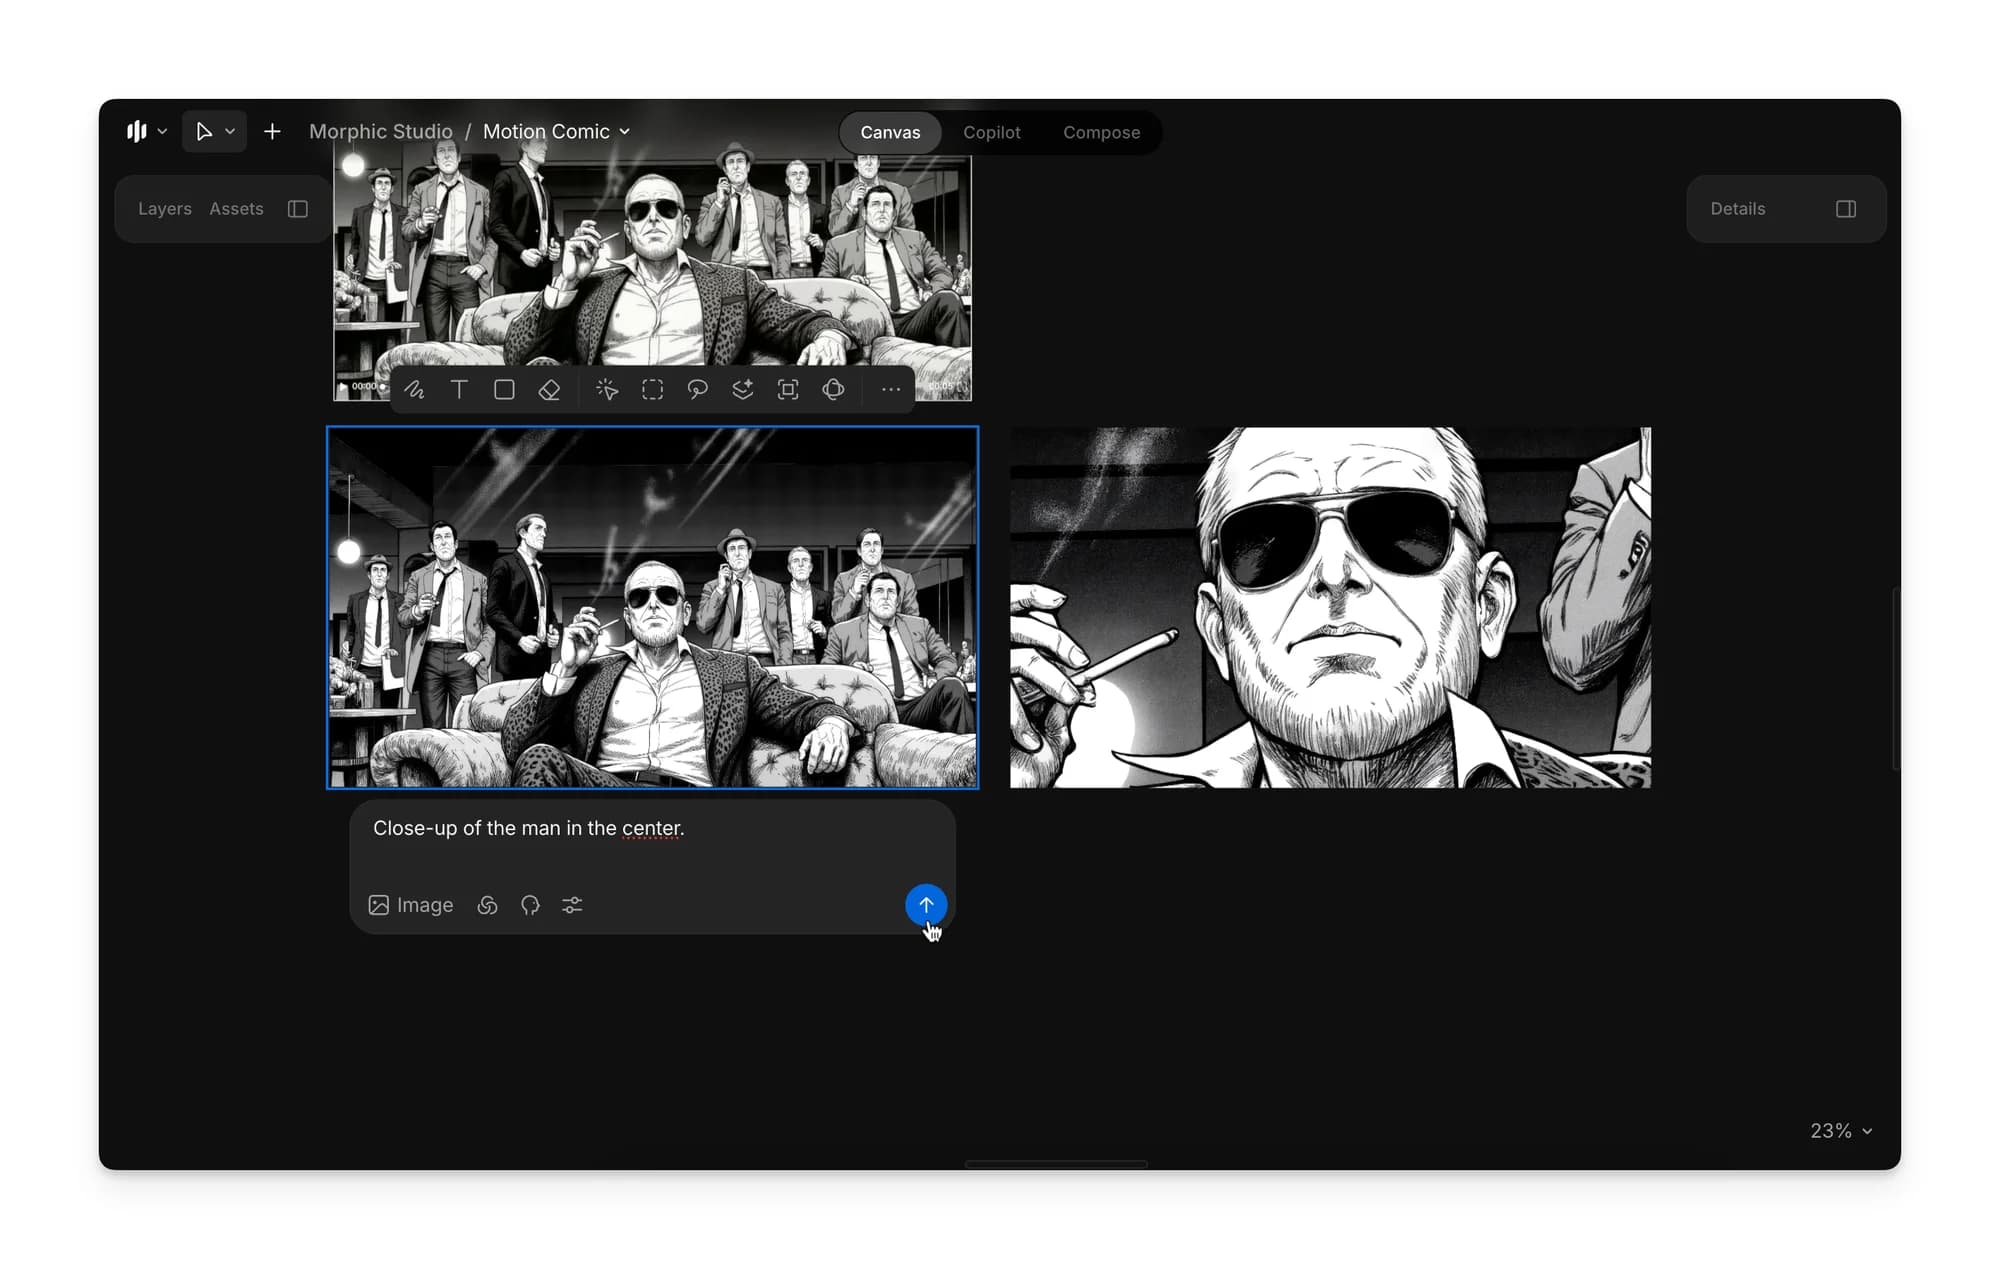
5. Wähle das erste Bild erneut aus, wechsle zurück in den Bildmodus und gib einen Prompt ein, der die gewünschten Änderungen beschreibt, um ein neues Bild zu generieren.
<figure><img src="https://4012032656-files.gitbook.io/~/files/v0/b/gitbook-x-prod.appspot.com/o/spaces%2FoPhHCbNZdzW70rakoLhf%2Fuploads%2FtK52SriDw3PAnlfXGEhv%2FCleanShot%202025-09-05%20at%2006.40.30%402x.png?alt=media&amp;token=2b7e1691-a27c-459e-a300-cb73ef417bb0" alt=""><figcaption></figcaption></figure>

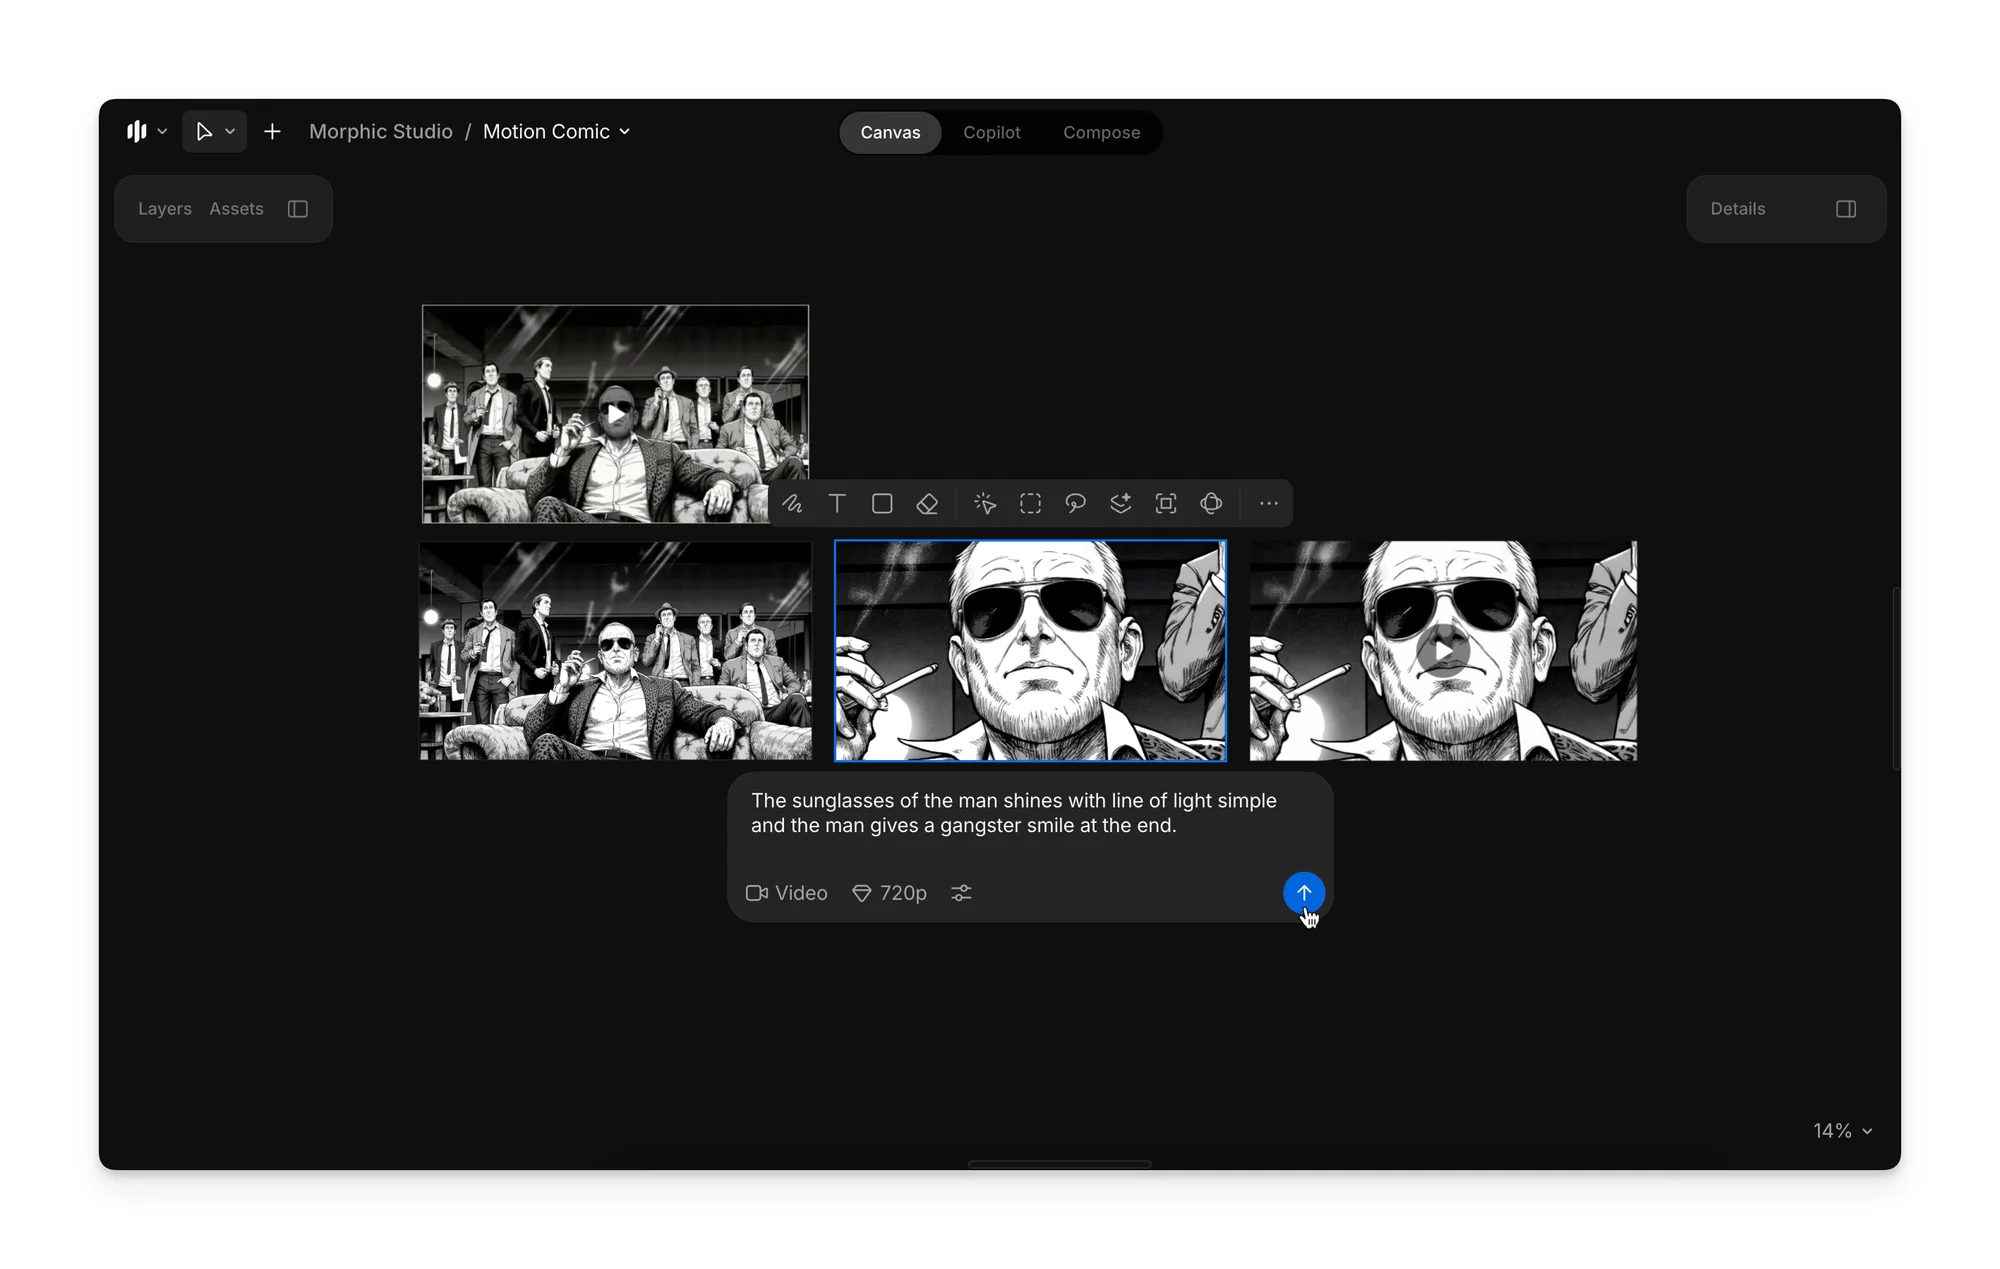
6. Wiederhole Schritt 4, um dieses neue Bild zu animieren und ein zweites Video zu erstellen.

<figure><img src="https://4012032656-files.gitbook.io/~/files/v0/b/gitbook-x-prod.appspot.com/o/spaces%2FoPhHCbNZdzW70rakoLhf%2Fuploads%2Fz2r25Egtz38Iti3OMj6u%2FCleanShot%202025-09-05%20at%2006.54.18%402x.png?alt=media&amp;token=01558604-ad6d-4398-8fcd-ffa6bc8e0b7d" alt=""><figcaption></figcaption></figure>

7. Wiederhole Schritt 5, um ein weiteres neues Bild zu erstellen, und dann Schritt 4 erneut, um es zu animieren und ein drittes Video zu generieren.
<figure><img src="https://4012032656-files.gitbook.io/~/files/v0/b/gitbook-x-prod.appspot.com/o/spaces%2FoPhHCbNZdzW70rakoLhf%2Fuploads%2Fe5nDHgh3iyrILXmdGJqF%2FCleanShot%202025-09-05%20at%2006.41.49%402x.png?alt=media&amp;token=d10f1bcf-8993-42d7-b8fd-2335f9f53447" alt=""><figcaption></figcaption></figure>

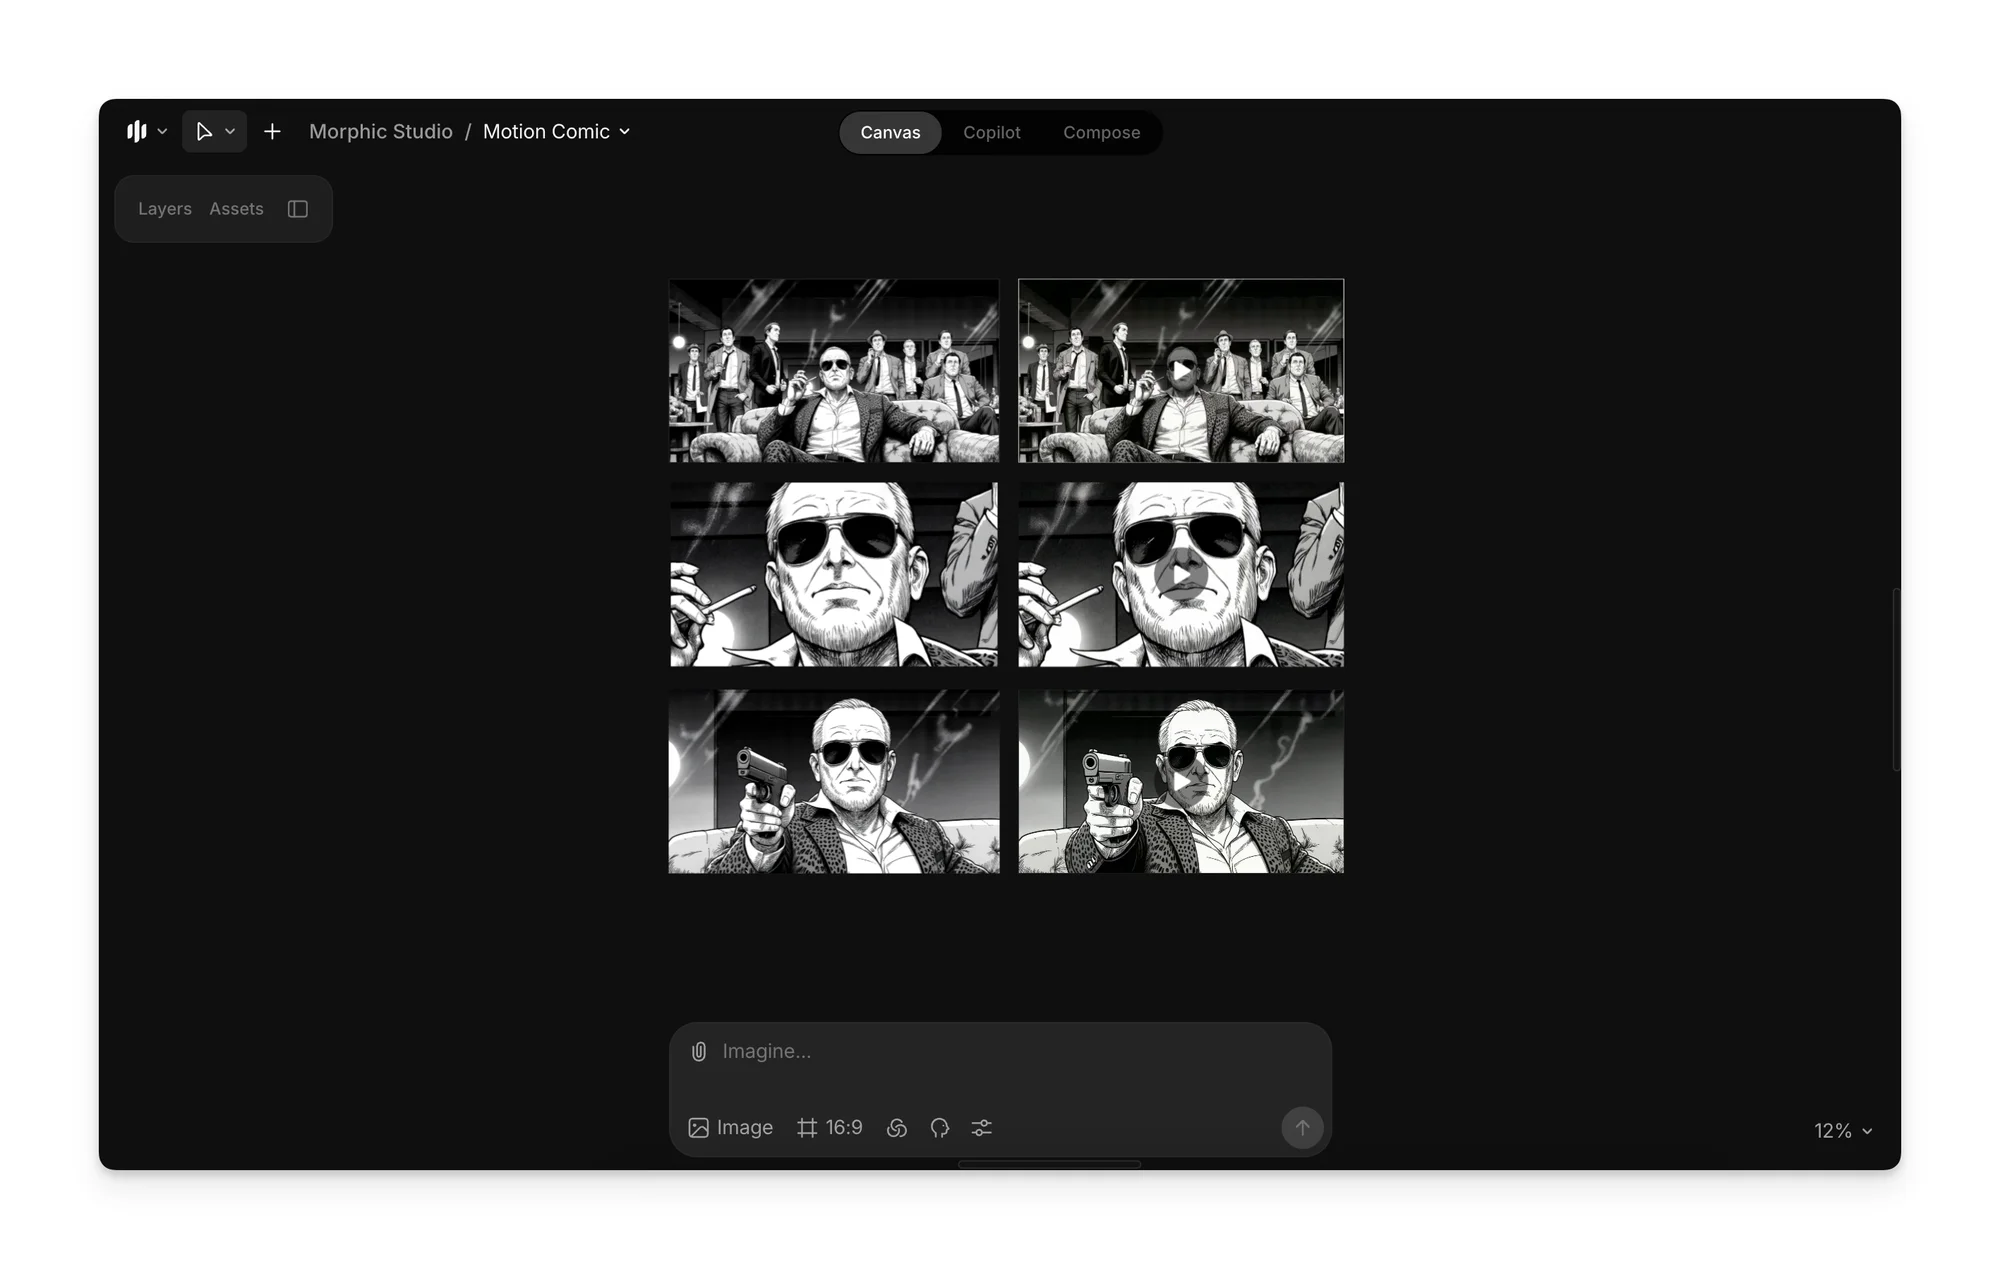
8. Du hast jetzt drei verschiedene Bilder und drei entsprechende Videos. Füge diese drei Videos zusammen, um dein finales Motion-Comic-Ergebnis zu erstellen:

<figure><img src="https://4012032656-files.gitbook.io/~/files/v0/b/gitbook-x-prod.appspot.com/o/spaces%2FoPhHCbNZdzW70rakoLhf%2Fuploads%2F3tMlVdjn6srkrnlBjJJh%2FMotioncomic-ezgif.com-video-to-gif-converter.gif?alt=media&amp;token=177e7bd9-45c4-4fd7-841d-3f6310fde718" alt=""><figcaption></figcaption></figure>

Das ist perfekt, um deinem Manga oder Artwork im eigenen Stil einen cineastischen Fluss zu verleihen. So kannst du mühelos von statischen Bildern zu einem Motion-Comic-Storytelling übergehen.

***

Wenn Sie Probleme haben oder Fragen haben, können Sie sich gerne an uns wenden. Wir helfen Ihnen gerne weiter. Schreiben Sie uns an [**support@morphic.com**](mailto:support@morphic.com)**.**


---

# Agent Instructions
This documentation is published with GitBook. GitBook is the documentation platform designed so that both humans and AI agents can read, navigate, and reason over technical content effectively. Learn more at gitbook.com.

## Querying This Documentation
If you need additional information that is not directly available in this page, you can query the documentation dynamically by asking a question.

Perform an HTTP GET request on the current page URL with the `ask` query parameter, and the optional `goal` query parameter:

```
GET https://morphic.com/docs/de/how-tos/creating-motion-comics.md?ask=<question>&goal=<endgoal>
```

`ask` is the immediate question: it should be specific, self-contained, and written in natural language.
`goal` is optional and describes the broader end goal you are ultimately trying to accomplish on behalf of the user. GitBook uses it to tailor the answer towards what is most useful for that goal.

The response will contain a direct answer to the question and relevant excerpts and sources from the documentation.

Use this mechanism when the answer is not explicitly present in the current page, you need clarification or additional context, or you want to retrieve related documentation sections.