What is a 3D storyboard, and when is it better than drawn boards?
A 3D storyboard is a set of frames from cameras inside one blocked 3D scene. Every panel shows where people stand and what the lens sees, and the geography holds from beat to beat.
Drawn boards are quicker for a first idea; 3D pays off once a scene has movement or several cameras. In Morphic the board is a 3D Scene that also plays as the animatic. Below, one beat as a panel and as the generated shot.
 Generated shot
 3D storyboard panel
Make a 3D storyboard in three steps
- 01
Block the scene
Describe the scene to Copilot, or hand it your shot list, and it builds the set, cast, cameras and cuts.
- 02
Board each beat
Give each beat a camera, fix poses and paths by hand, and press P to save a snapshot of any frame.
- 03
Play the animatic
Render the scene as a video with its cuts and timing, then generate the final shots from it.
Board each beat in a 3D scene
Build the set and cast for the 3D storyboard
Copilot builds the location and cast from a library of people, vehicles, props and whole locations, or you upload your own .glb, .gltf or .obj set. Colour and name labels make the cast readable on every panel.
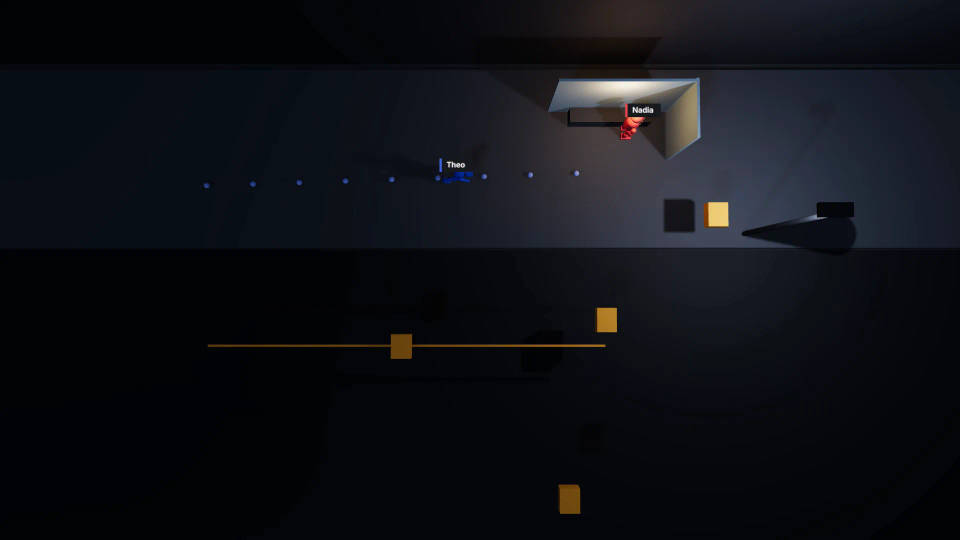
Frame every storyboard panel with its own camera
Add a camera per beat and cut between them. Pick a lens preset and set field of view and roll, or use a one-click angle for a quick low, overhead, two-shot or over-the-shoulder frame.
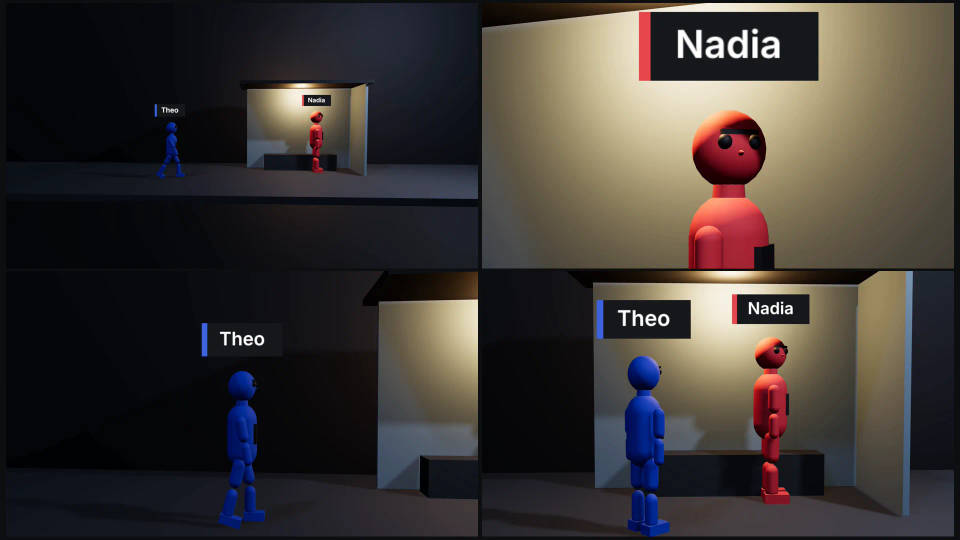
Pose the moment each panel needs
Pick a pose preset or pose any body part, set height and body width, and give each figure a path to walk or run. Save a motion as a clip to repeat a gesture on another figure.
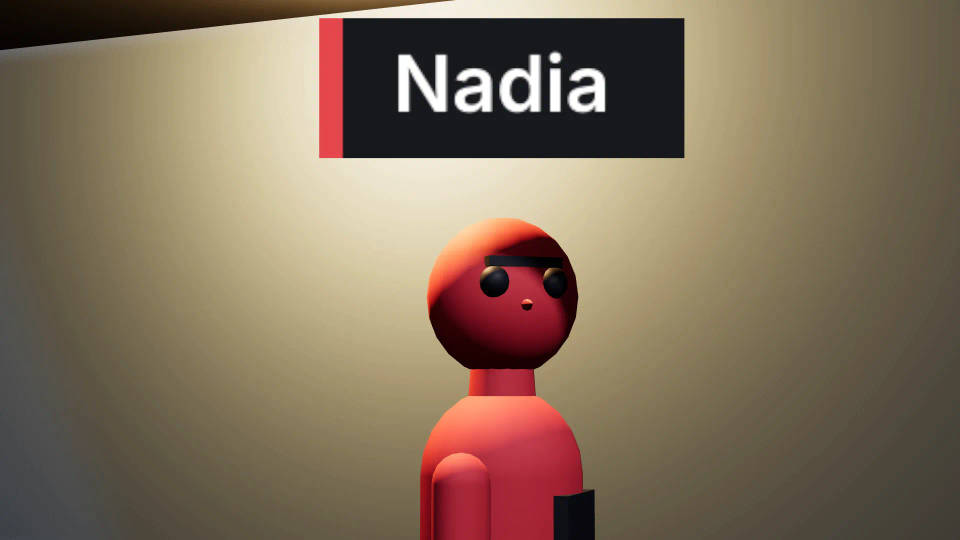
Turn the 3D boards into an animatic with timing
Timing to the frame
Each panel is a camera in a moving scene, so once the cuts are set, the animatic is there. Slide a cut, slow a walk or hold a look on a timeline that zooms to single frames.
Camera feel and checks
Record a camera move live, or set a Camera style for the rig feel and shake. The editor flags a camera crossing the 180-degree line; temp sound goes on in Compose.
Export the storyboard frames and the 3D animatic
Video and Still frame export at 720p or 1080p in five aspect ratios, widescreen to vertical. A scene card on the Canvas also downloads the video, a thumbnail or the scene file without opening the editor.
| Export | What you get | Use it for |
|---|---|---|
| Video | The animatic as an MP4, rendered in the browser at no credit cost | The Canvas beside the script, or the pitch |
| Still frame | The current camera's panel as a PNG | Pitch decks and printed boards |
| Scene file | The whole 3D scene | A backup, or a hand-off to a colleague |
Generate the final shots from the 3D storyboard
Attach the animatic, or a snapshot of one panel, and name each figure by colour. The board guides staging, screen direction and angle; the model adds faces and light. The 3D scene to AI video guide covers the handoff, and previs software covers whole sequences.
The red figure is a nurse in navy scrubs. The blue figure is a boy in a yellow raincoat. Keep the staging and camera from the reference.
Other storyboard routes: from a script or a grid
From a script
Copilot boards straight from a script: see the AI storyboard generator.
Frame by frame
The cinematic storyboard guide generates panels from a scene description, and the Cinematic Storyboarding workflow runs it with your character references.
As a grid
The 3x3 photo storyboard shows one scene in several framings.
Mix the routes
Draw the quiet beats and block the complicated ones in 3D. Compare the best AI storyboard tools.
All on Morphic
Previs software
Previs a whole sequence in 3D, then use the blocking video as the reference for every shot.
3D scene maker
Describe a shot and Copilot builds the set, cast, action and camera, then direct any detail.
AI storyboard generator
Board a scene from a script in frames, then block the shots that need it in 3D.
Camera blocking tool
Plan where everyone stands and where the camera goes, and check the frame through the lens.