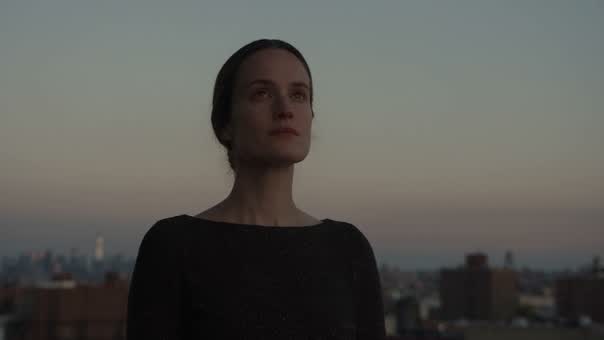
Push contrast and warmth, then compare against the original. The values sit on the clip, not in the picture.
Color grading online means setting contrast, exposure, warmth and per-color balance on the clips where the cut already lives, in your browser. Curves, wheels and 3D LUTs are there for the work that needs them. A look is saved with the project, so it renders the same way for whoever opens it next.
How to color grade a video in three steps
- 01
Correct each clip
Set exposure and white balance until the shots stop disagreeing with each other.
- 02
Put the look on top
Grade the sequence once the clips underneath already match.
- 03
Export it graded
Render MP4 up to 4K on your own machine with the grade inside the picture.
What the grading controls cover
Grading is a Compose V2 capability, and V2 is switched on one workspace at a time.
The controls a colorist expects
Brightness and contrast, shadows and highlights, warmth and tint, with curves and wheels for the work that needs a finer hand. Enough range to fix a shot and enough to give a sequence a deliberate character.
One color at a time
Per-color control means pushing a single range without dragging everything else with it. Skin held where it should be while a background cools is the everyday version of this, and it is what separates grading from tinting.
Bring a 3D LUT
A LUT developed elsewhere or handed over by a client applies to a clip and becomes the base the rest of the grade sits on. Exposure and contrast underneath it still want setting for your own footage.
Check it against the original
Hold backslash and the output drops back to the ungraded picture while you hold it. Used often, that is the only reliable defence against a grade drifting further than intended over an hour of looking at it.
A look that travels
Saved looks belong to the project and not to a machine, so the grade renders identically for whoever opens it. A second editor picking the cut up does not inherit a different image.
Grade over time
Color values animate like any other property, so a shot can warm as a scene turns or brighten as a light comes up, instead of one flat treatment across its whole length.
A grade cannot recover a shot that was never exposed for. Where a sequence needs an image the footage cannot give, generate it in the same project against the look you have already built, choosing from the whole model roster, and grade it into the run with everything else. Seedance 2.5 is one of the video models on that roster.
Color grading online, with the cut in the same place
Grading has traditionally been the last department: the edit is locked, a colorist takes the file, and it comes back. Every change after that is expensive, so the grade gets decided once against a cut nobody may touch.
Doing it beside the timeline moves the grade earlier, into the part of the process where things are still moving:
- A shot that will not match its neighbours is caught while a different take is still an option.
- A look tried on two minutes tells you whether it survives the rest of the sequence.
- Shortcuts are remappable in saved sets that follow your account, so Premiere and Resolve muscle memory keeps working.
- On the Pro plan and above someone else can be on the same timeline while you grade, so the note arrives against the version you are looking at.
Desktop suites go further for a final theatrical pass. For a piece finishing on a feed, a site or a client review, a grade that lives with the cut is worth more than one that is better in isolation and slower to change.
Color correction video online
Correction and grading are different jobs and only one is creative. Correction makes shots agree: exposure levelled, white balance matched, black and white points where they belong, so a cut between two cameras stops announcing itself.
Doing it first is what makes everything after it work, because the same look on a warm shot and a cold one takes them further apart. Level the footage, watch the cut with no look at all to see whether anything jumps, then grade. That order costs ten minutes and removes most of the frustration people blame on grading tools. When a shot is beyond correcting, video filters can treat it into looking deliberate instead.
LUTs online, and what they are good for
A LUT is a look packaged as a lookup, which makes it portable and also blunt. It was built for a particular camera at a particular exposure; applied to yours it lands near, not exactly. So treat it as a base:
- Correct the clip first.
- Apply the LUT.
- Bring exposure and contrast back to where they belong underneath it.
That way a client-supplied look holds across a sequence and still lets you fix a shot that fights it. Applied the other way round, as one click on uncorrected footage, it gives the flat over-tinted result that earned LUTs their reputation.
AI color grading, and where asking helps
The useful version is not a button deciding how your film should look. It is describing a change and having it applied across a timeline: warm the whole interview, lift the shadows on every shot from the second camera, take the green out of the office scenes.
Copilot reads the timeline before it acts and applies the result as one action, so something you dislike is a single undo rather than a manual reversal of thirty clips. The judgment about what the sequence should look like stays with you. The work of applying it thirty times does not.
Related video tools
Online video editor
The timeline the grade sits on, alongside cutting, titles and sound.
Video filters
Treatments and looks for when the job is character, not correction.
Keyframe animation
Let a grade change across a shot instead of sitting flat through it.
AI video upscaler
When the problem with a shot is resolution, not color.
AI photo enhancer
The same correction problem on a still that has to sit in the sequence.
Video merger
Get the sequence assembled before deciding what all of it should look like.
Best AI video editors
How browser grading compares with the desktop suites, in context.
AI style transfer
A wholesale change of image, when a grade is not a big enough move.